Hybrid on-premises
1. Extracting guide data
To get started you first need to create your guides on CLOUD (lmw.technia.cloud). This requires the latest Light My Way extension that can either be installed from Chrome/Edge store Light My Way or self-hosted 2. Self hosting client (web-extension).
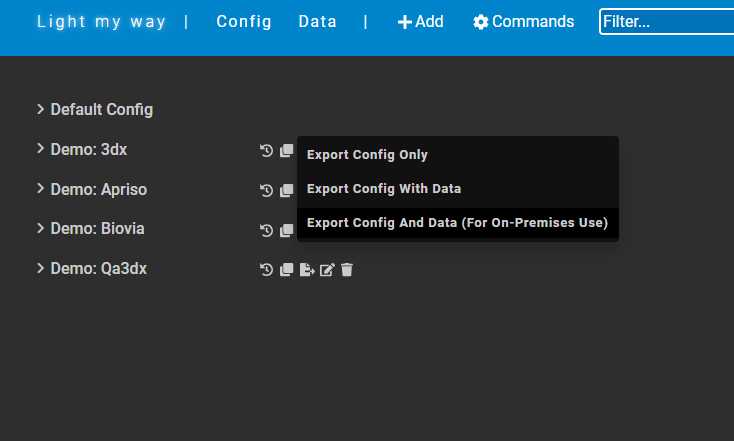
When the guides are done you login to the Admin UI and export them by clicking on the export icon.
The exported ZIP-file can then be provided on-premises as you choose. The Light My Way client (user browser) need access to the guide data file through https on the network.
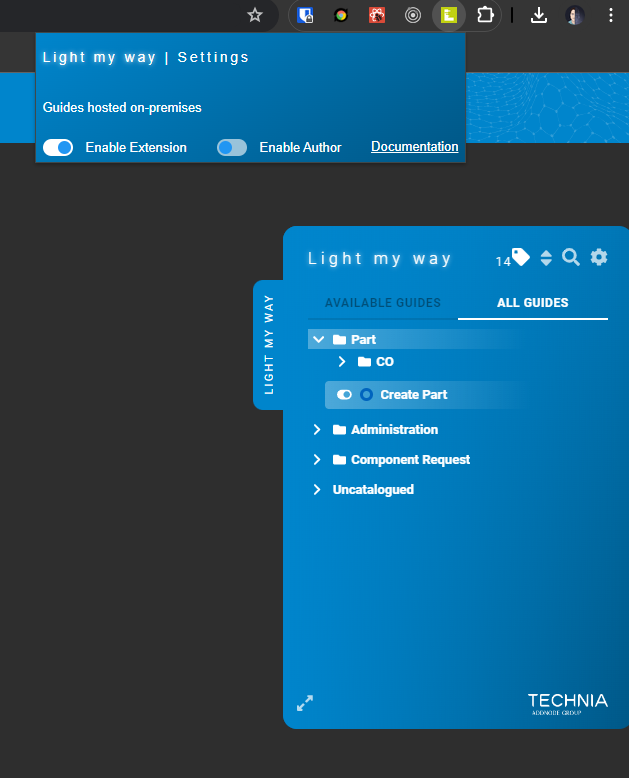
To connect the extension to the file add the url to the registry Light My Way (e.g. hosted-guides-path: https://companyurl/path-to-repository).
Light My Way will then load all guide data from the export file and the extension will not connect to CLOUD.
2. Self-hosting client (web extension)
To self-host the extension you need to host two files (3 with the JSON data file)
- the update file (e.g.
update.xml) - the extension package (e.g.
lmw-2024.2.crx).
The files needs to be hosted over HTTPS (Reference: https://developer.chrome.com/docs/extensions/how-to/distribute/host-on-linux#update). We recommend hosting these together with the guide data JSON (there is a version dependency).
Extension package
The extension build (.zip) can be downloaded from products.technia.com.
Then you will have to build the extension package (.crx) using the browser. (Reference: Create a .crx file)
Update file
The update file (.xml) needs to be edited according to how its hosted.
In below example these values needs to be updated:
<updatecheck codebase='path-to-extension.crx' version='version (must match extension version)' />
Example:
<?xml version='1.0' encoding='UTF-8'?> <gupdate xmlns='http://www.google.com/update2/response' protocol='2.0'> <app appid='abgmfmhjplgnlmjoglbgddpdnfdcjenj'> <updatecheck codebase='https://<YOUR_HOSTING_URL>/lmw-2024.2.crx' version='2024.2' /> </app> </gupdate>
Please refer to this page on more details about the elements of the update file.
Learn more
Web Extension self-hosting is supported technology for Chrome and MS Edge.
Please refer to browser documentation for more information.
- Chrome https://developer.chrome.com/docs/extensions/how-to/distribute
- MS Edgehttps://learn.microsoft.com/en-us/deployedge/microsoft-edge-manage-extensions-webstore.
3. Distribution
Self hosted extensions can be distributed just like the Chrome Store hosted extension using the registry Light My Way.
The registry file also needs to be edited with the correct values and path to the update file.
In below example these values would need to be updated:
update_urlruntime_allowed_hostshosted-guides-path
Example:
Windows Registry Editor Version 5.00
[HKEY_LOCAL_MACHINE\SOFTWARE\Policies\Google\Chrome\ExtensionSettings\abgmfmhjplgnlmjoglbgddpdnfdcjenj] "installation_mode"="normal_installed" "update_url"="https://<YOUR_HOSTING_URL>/update.xml" "runtime_allowed_hosts"="[\"://<your local environment url>.com\",\"://<your data url>.com\"]" "runtime_blocked_hosts"="[\"*://*\"]"
[HKEY_LOCAL_MACHINE\SOFTWARE\Policies\Google\Chrome\3rdparty\extensions\abgmfmhjplgnlmjoglbgddpdnfdcjenj\policy] "hosted-guides-path"="https://<YOUR_HOSTING_URL>/data-export.json" "lmw-server-url-editable"=dword:00000001 "lmw-author-mode"=dword:00000000 "lmw-registry-script-executed"=dword:00000000
4. Hybrid in practice
Initial setup
-
Web extension hosting
-
Define where and how to host the local resources, apache or nginx is examples. A DNS alias is recommended as that bring some flexibility.
update.xmlextension-name.crxdata-export.json
-
Configure
update.xml. (This is key for the client machines to automatically update the web extension)appid- must match the generated crx package idcodebase- must match you hosting urlversion- must match the manifest version
-
Create crx package
- Download the latest version from products.technia.com
- Follow the steps google docs how to build you local package
- Note that the
update_urlin the manifest must be updated to match your local hosting - Keep the
.pemfile for future updates (generate the same id crx)
- Note that the
-
-
Create & export content (guide data)
- Record guides with TECHNIA.cloud services using target environment replica (QA / DEV with no sensitive PLM data)
- Export
data-export.jsonfor on-premises from the Admin UI on TECHNIA.cloud. - Deploy
data-export.jsonfile on the path defined in registryhosted-guides-path
-
Distribution - define & test registry package
- Configure extension id (replace
abgmfmhjplgnlmjoglbgddpdnfdcjenjin the above example to match your generated package id) - Configure path to update xml
update_url - Configure path to data file
hosted-guides-path - Configure target environment
runtime_allowed_hosts(note that data file host must be included)
- Configure extension id (replace
Deploying updates
Note that any updates to the client or data package must match. I.e. when exporting a new data package, the latest cloud version used to create that package must also be updated in local hosting.
-
Generate new
extension-name.crxfrom the latest version matching technia.cloud (download from products.technia.com)- Remember
update_urlinmanifest.json - Use
.pemfile generated the first time to keep the extension name intact
- Remember
-
Update
update.xmlto match with theversionfound inmanifest.json -
Deploy the updated files in the hosting
extension-name.crxupdate.xmldata-export.json
Distribution
Share / remove the package to user machines registry is normally done centrally from IT using GPO or other enterprise software distribution tools e.g. Software Center.
Test setup
DTAP deployment process can be enabled by generating separate extension ids, update.xml, data-export.json and distribute to specific test machines before deploying to prod.