The Administrator
[data-colorid=mr8oc7xigg]{color:#36b37e} html[data-color-mode=dark] [data-colorid=mr8oc7xigg]{color:#4cc994}[data-colorid=vk8bmq6tp3]{color:#36b37e} html[data-color-mode=dark] [data-colorid=vk8bmq6tp3]{color:#4cc994}[data-colorid=y35m5tr4zp]{color:#ff5630} html[data-color-mode=dark] [data-colorid=y35m5tr4zp]{color:#cf2600}[data-colorid=s1jllsxbm5]{color:#ffc400} html[data-color-mode=dark] [data-colorid=s1jllsxbm5]{color:#ffc400}
The Administrator
To enable authors to record guides easily by point and click, without getting into the technical details, pre-set configurations are used to control how things are recorded for different platform target elements and contexts.
As example these configurations control
- How target elements are identified
- The contexts used to control when instructions should show
For the supported platforms, such as 3DEXPERIENCE, rich and build-in default configuration are included with the product.
To allow authors to record new, customized or for other reason modify or override configurations to better fit customer specific needs it is possible to extend these configurations.
TECHNIA is interested in extending the built-in configurations and standard platform product support.
General
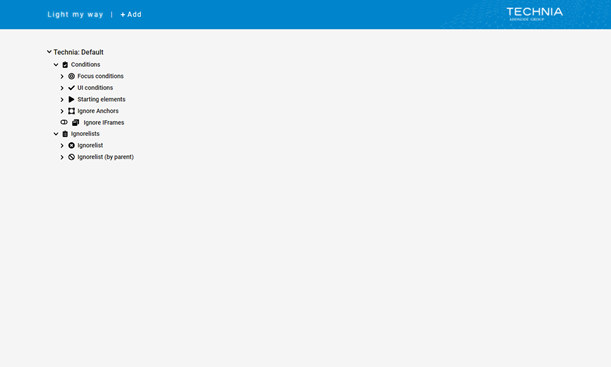
To overview all recorded data, export/import or to better support your authors specific recording needs, there is an Admin UI. In the admin UI you can easily create, edit and remove configuration items (e.g. contexts). The admin UI is web based and available with any supported browser.
To access the Admin UI go to https://lmw.technia.cloud/admin
The Admin UI is protected by login authentication using your username and password (that you get with your subscription).
Insight
The client evaluation data can be used to provide valuable statistics and insights for administrators.
Privacy
Privacy policy was updated 2024.1.0 to cover insight data updates.
Insight logging is anonymous by default, but real user names can be enabled to make visible in subscription overview.
Real user names is not available for LMW or platform usage.
Insight logging is enabled by default but can be turned off completely or partly using repo settings.
Light My Way usage
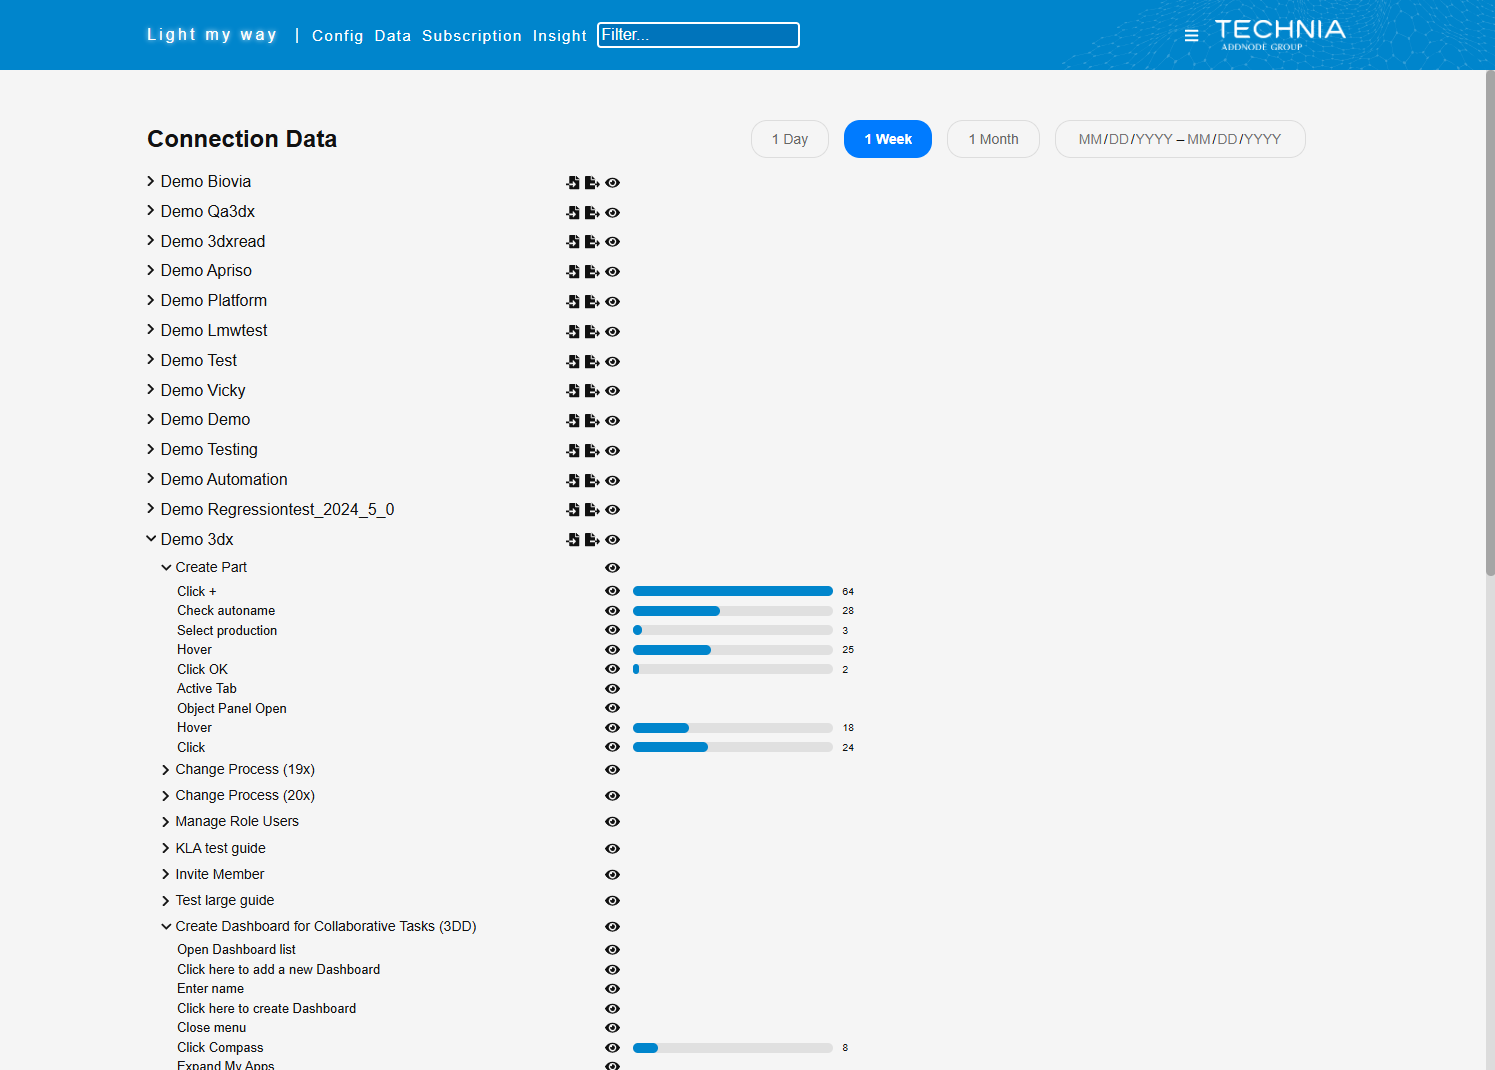
For administrators to see anonymized light my way usage statistics, such as the number of times an instruction has been viewed. This information can be useful to identify popular or unused guides, and even identify misconfigured instructions or trends.
The Light My Way usage insight is found in the Data tab.
Platform usage
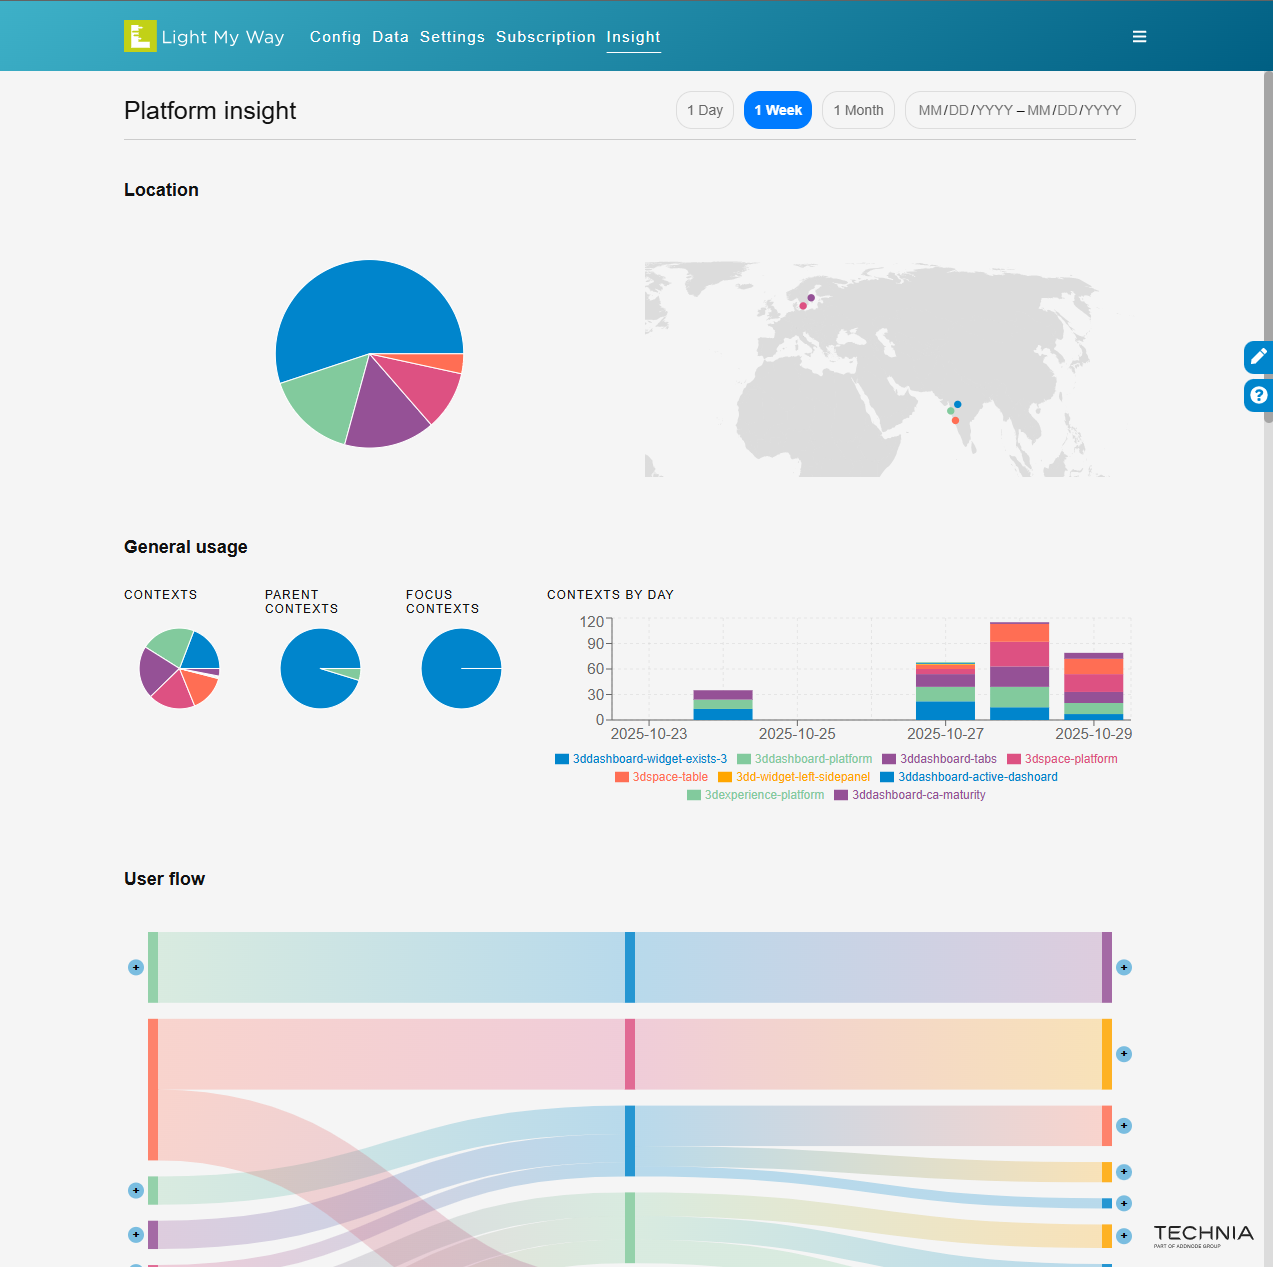
For administrators to see anonymized target platform usage statistics, such as how many times the different apps has been used. This information can be used to understand true user behaviour, identify misuse, training needs or unused parts of the application.
Platform usage is found in the Insight tab.
Platform contexts logging is controlled in the Config tab. TECHNIA maintained configs can be toggled of with Repo settings.
Subscription
For TECHNIA and administrators to audit the install base of Light My Way.
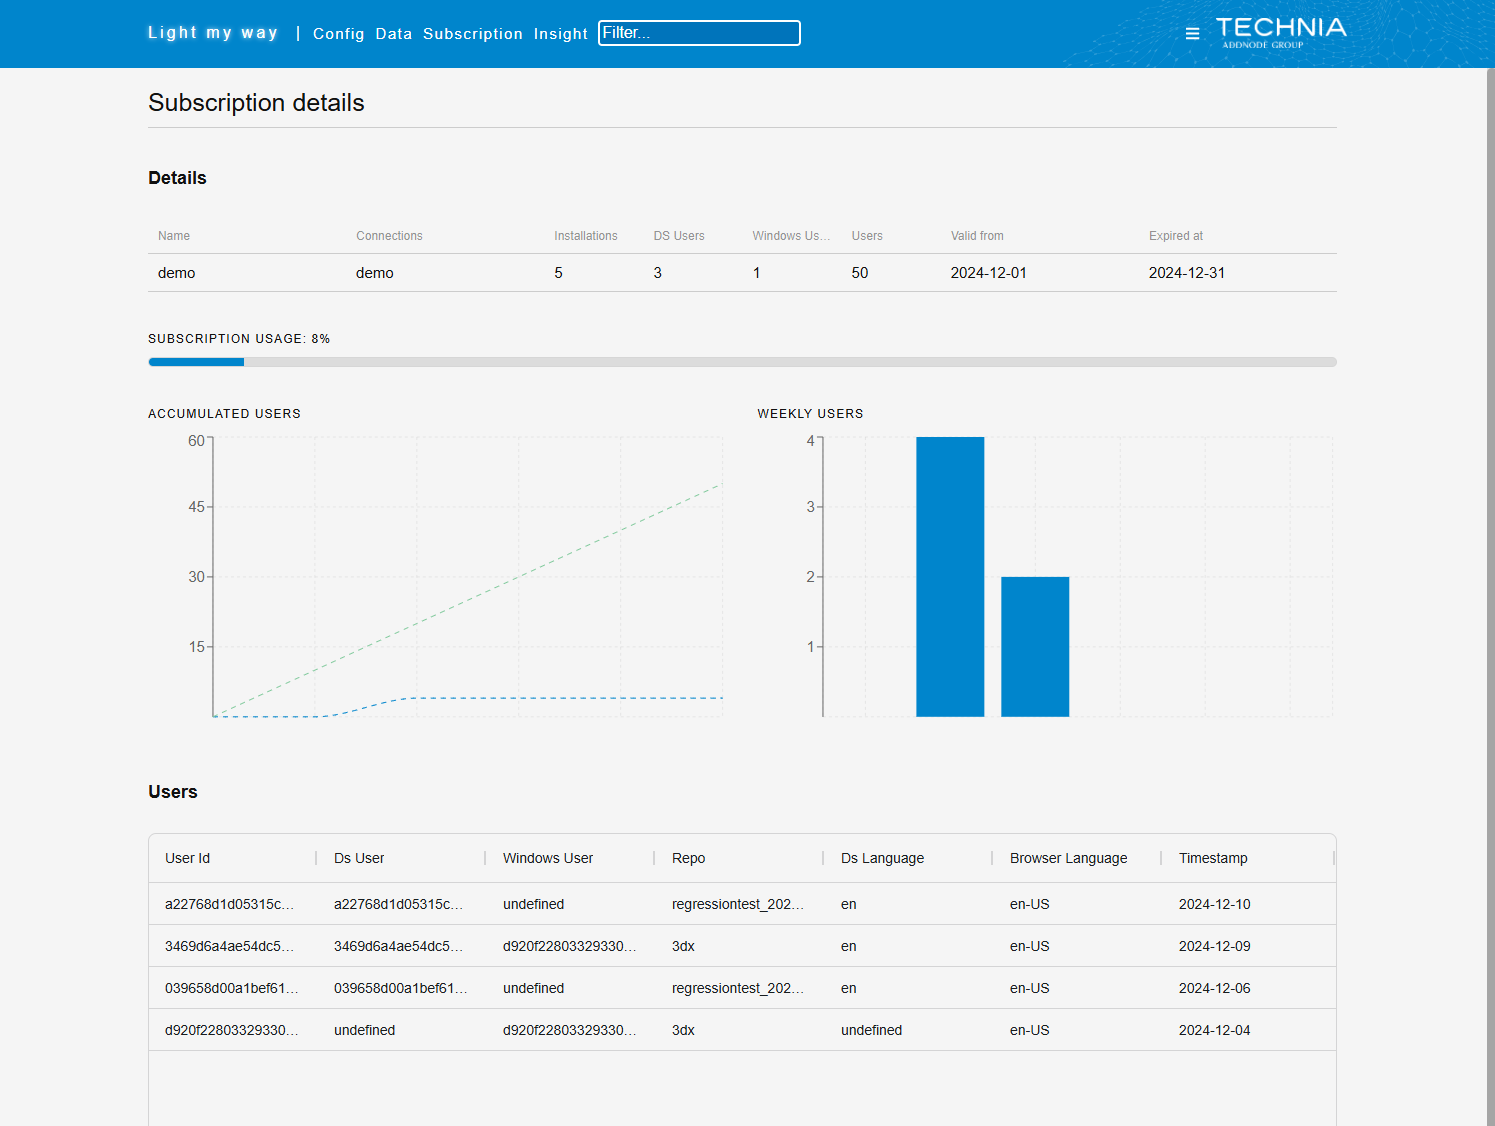
The information includes an anonymized User Id (browser install), their last use date and language settings. There are also some visuals displaying weekly users and a accumulated users chart over the full subscription period, this can be used to understand the trend and if the current subscription will cover the need for the full period.
Subscription user detail will be found in the Subscription tab.
Optionally the DS and/or Windows user can be included. See managed storage keys for details.
Config
Edit & Delete
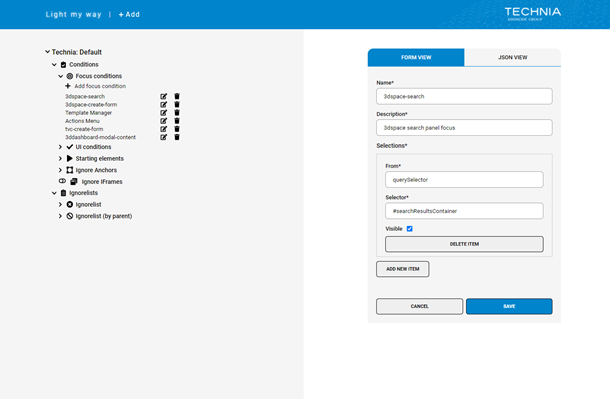
To edit or remove a configuration item simply choose the target platform in the tree list and the configuration item you want to edit or remove.
Add
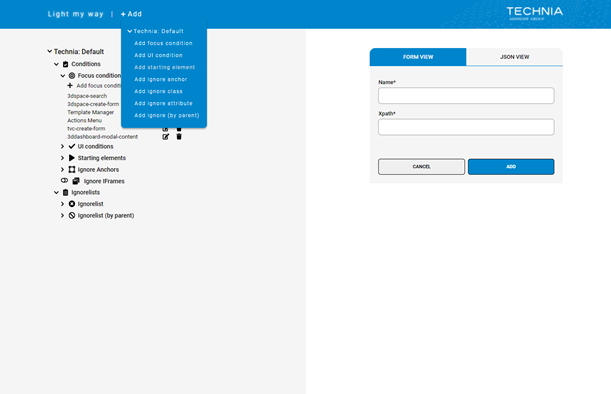
To add a new configuration item either click on the add button in the tree list under the chosen configuration type or click “+ Add” in the top bar.
History
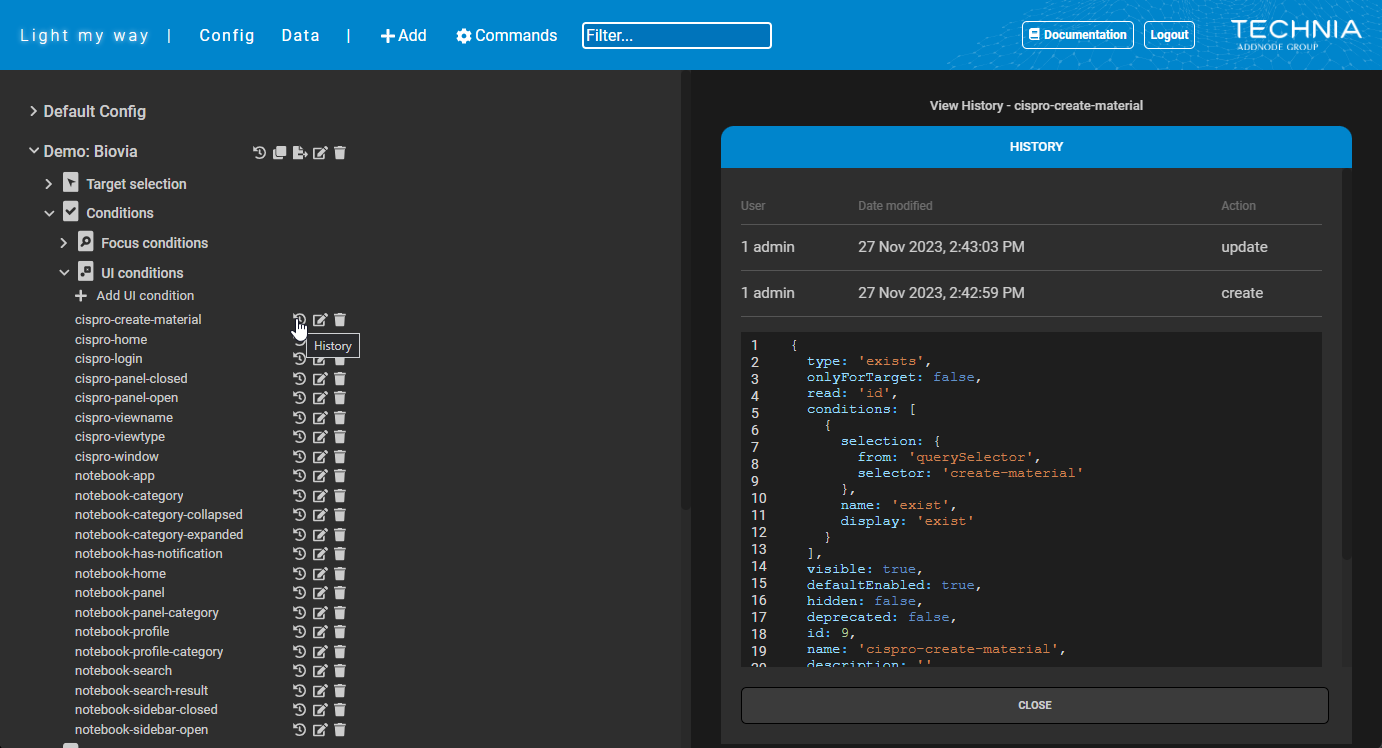
Check configurations history, e.g. who and when created or modified a context or Target Element.
Targets
Targets are the html elements that an instruction is tied with. The instruction callout is positioned relative to the target and is displayed if the target html element is present only. There are two different methods to identify a target element.
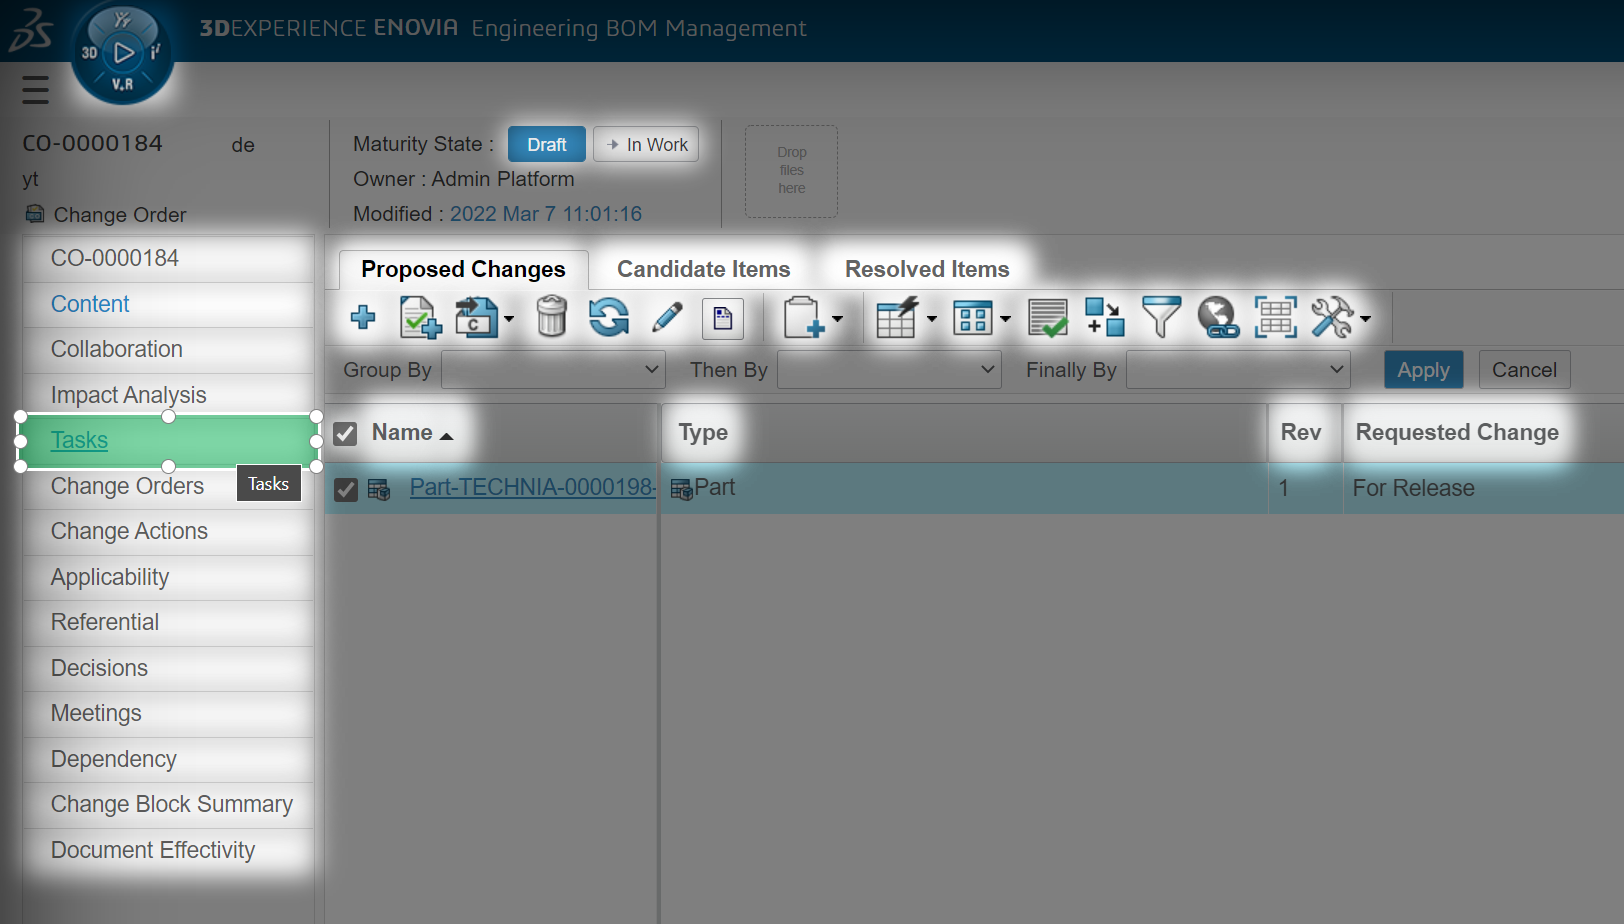
Target elements (green targets)
This is the preferred method for authors to select target elements and will only store key value identifiers of the target with the instruction data. The selector used to identify the target is maintained as configuration and makes it possible to improve over time.
This is the method of the built in and with product supported green targets.
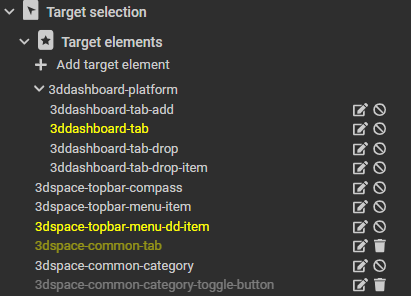
Targets defined this way will be presented in highlight and green to authors (as the supported targets).
Administrators could extend the list of target elements to indicate good target selections to their users.
To create a new target either clone an existing one or add a new one by clicking on the “+ Add” in the top bar and choose “Create New Target”.
CSS-based target formulas
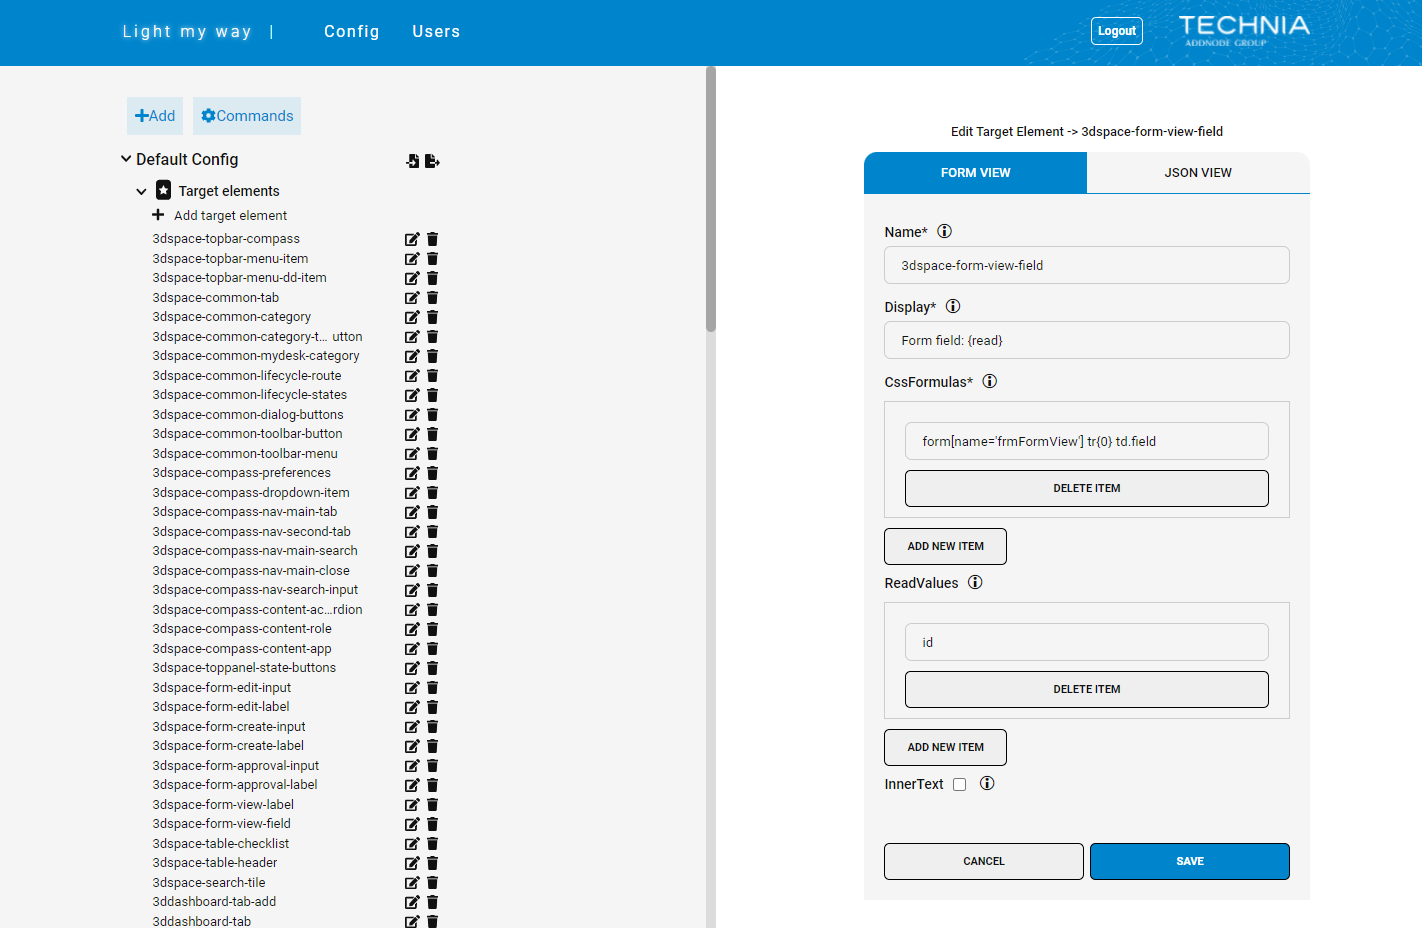
Target elements defined using CSS-based formulas.
Example:
Formula: form[name='frmFormView'] tr{0} td.field
Read value: id
In this case the stored data on the instruction is the id of the parent tr but the selected element will be the child td.field.
This can be done with multiple read values and multiple formulas enabling platform independent targets with different css selectors but same matching unique identifier (read values)
XPATH-based target formulas
Target elements can also be defined using XPATH-based formulas.
XPATH should be used only where a CSS formula is not possible, as XPATH formulas are more complex and slower to evaluate, they should only be used when necessary.
Reasons to use XPATH formulas could be that the desired target element has styling: 'pointer-events: none', an overlapping element is blocking the target element with unique identifier or there is some other advanced pathing needed.
Defining a target element using xpath formulas and readvalues is done the same way as with css formulas, however there are some considerations to make a valid xpath.
When using readvalues in xpath formula the index '{0}' is replaced by ` and contains(@attribute, 'attributevalue')` for each readvalue in the formula.
The xpath formula with readvalues must contain some base identifier to make it evaluable without a readvalue.
Examples:
 //div[{0}] => //div[ and contains(@attribute,'value')]
//div[@id='topbar' {0}] => //div[@id='topbar' and contains(@attribute,'value')]
//div[contains(@class,'topbar') {0}] => //div[contains(@class,'topbar') and contains(@attribute,'value')]
Fields
Name | a unique id to identify this type of target |
Display | how to present the target to the author |
CSS Formulas | css selector-based formulas used to match the target element and read value |
XPATH Formulas | xpath selector formula used to match the target element and read value |
Read Values | the unique data used to
|
Inner Text | if checked the inner text of the target will be stored as a read value and matched with the selected target |
Parent Context | An array of parent context ids. During evaluation, one of the parent contexts need to be found for the target element to be evaluated. |
Focus configuration will affect green or highlighted target elements
XPATH based (yellow) targets
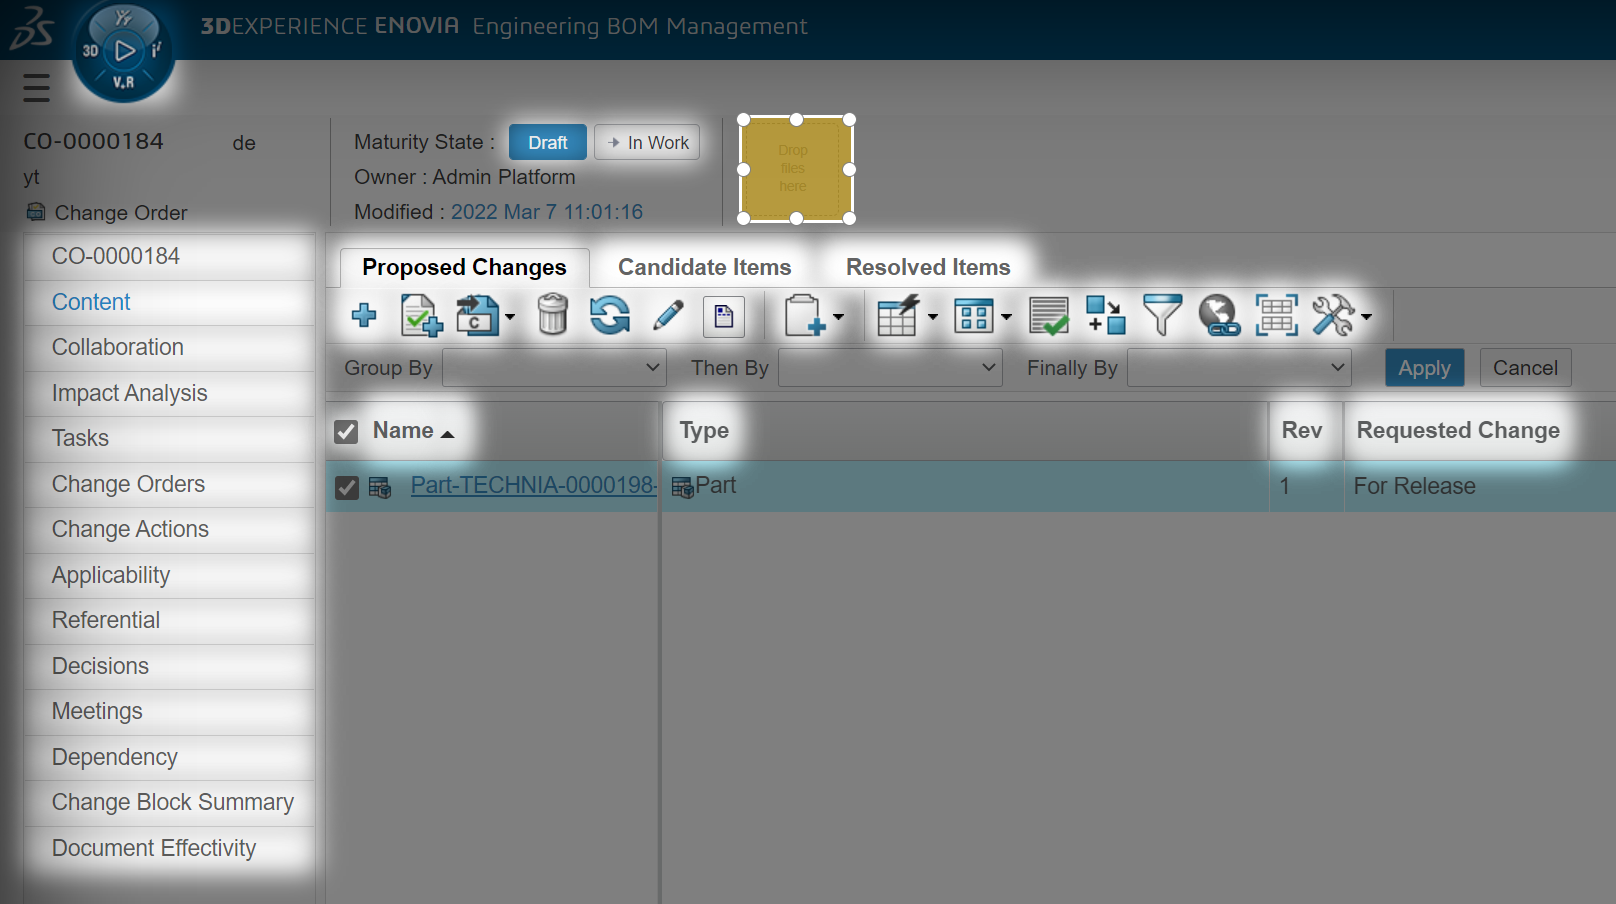
To provide flexibility there is also a fall back target recording method using xpath. Using the flexibility of xpath authors can record anything they want but will also tie instruction closer to the html and it will be more sensitive to change. When selecting a yellow fall back element an xpath is automatically generated. Multiple configuration types are used to control how xpaths are generated.
Built in with the product is a set of ignored classes attributes etc to generate a good xpath starting point.
Starting Elements
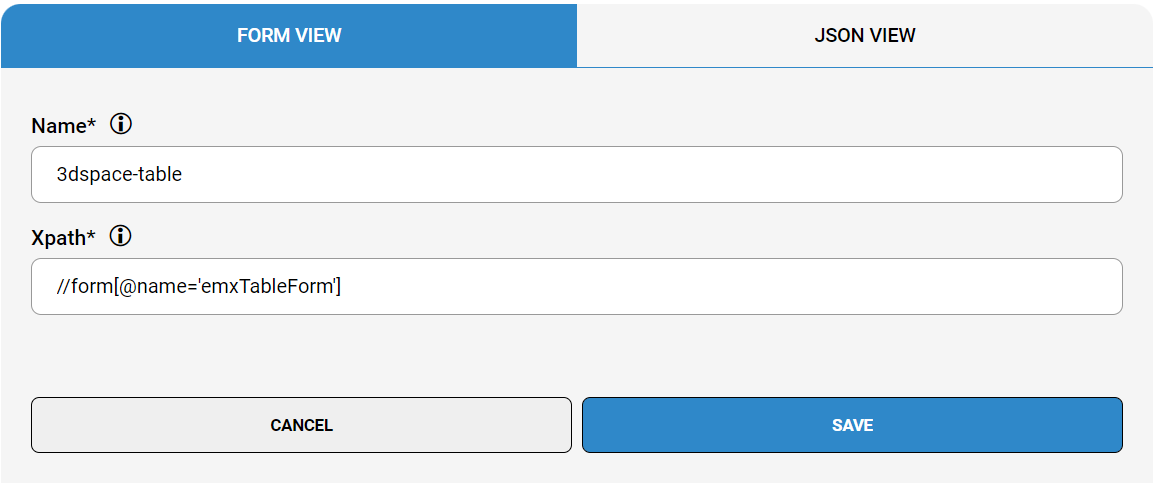
Starting elements are used to truncate all XPATH before the matching starting element. This to make the stored XPATH nice, clean and less sensitive to context, changes or version.
Starting elements are defined using XPATH.
Fields
Name | A description used to understand what the starting element does |
Xpath | an xpath expression, if matched somewhere in the parent structure during target element selection, the recorded data address will start from this point and all xpath beyond this point will be omitted |
Using the Focus feature, it is mandatory for target element's selection to start within the focus area. I.e. starting elements have to start on or within the focused area or it will be excluded from evaluation.
Making a too short XPATH would require to control more of when to show the instruction using contexts.
For the staring element to match, the data have to be part of the generated xpath (can not be in the ignored list)
Ignore Lists
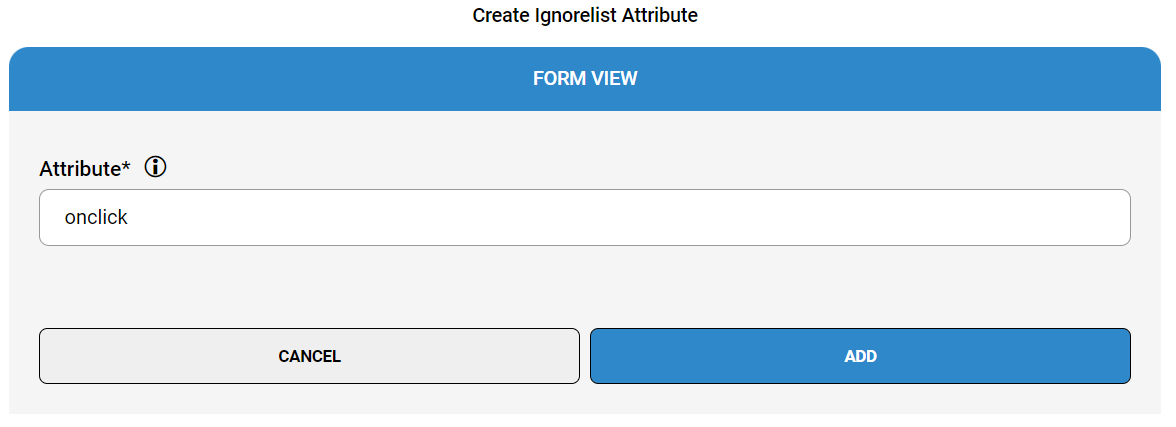
Ignore lists are used to define the class or attribute names to exclude from the recorded XPATH. This to make the stored XPATH nice, clean and less sensitive to context, session, changes over time or version.
Fields
Class | the class to be ignored in the recorded data |
Attribute | the attribute to be ignored in the recorded data |
The ignore list configurations are global and will affect all view and target element XPATH selection. Only class and attributes that should be avoided in all cases should go here.
Ignore By Parent
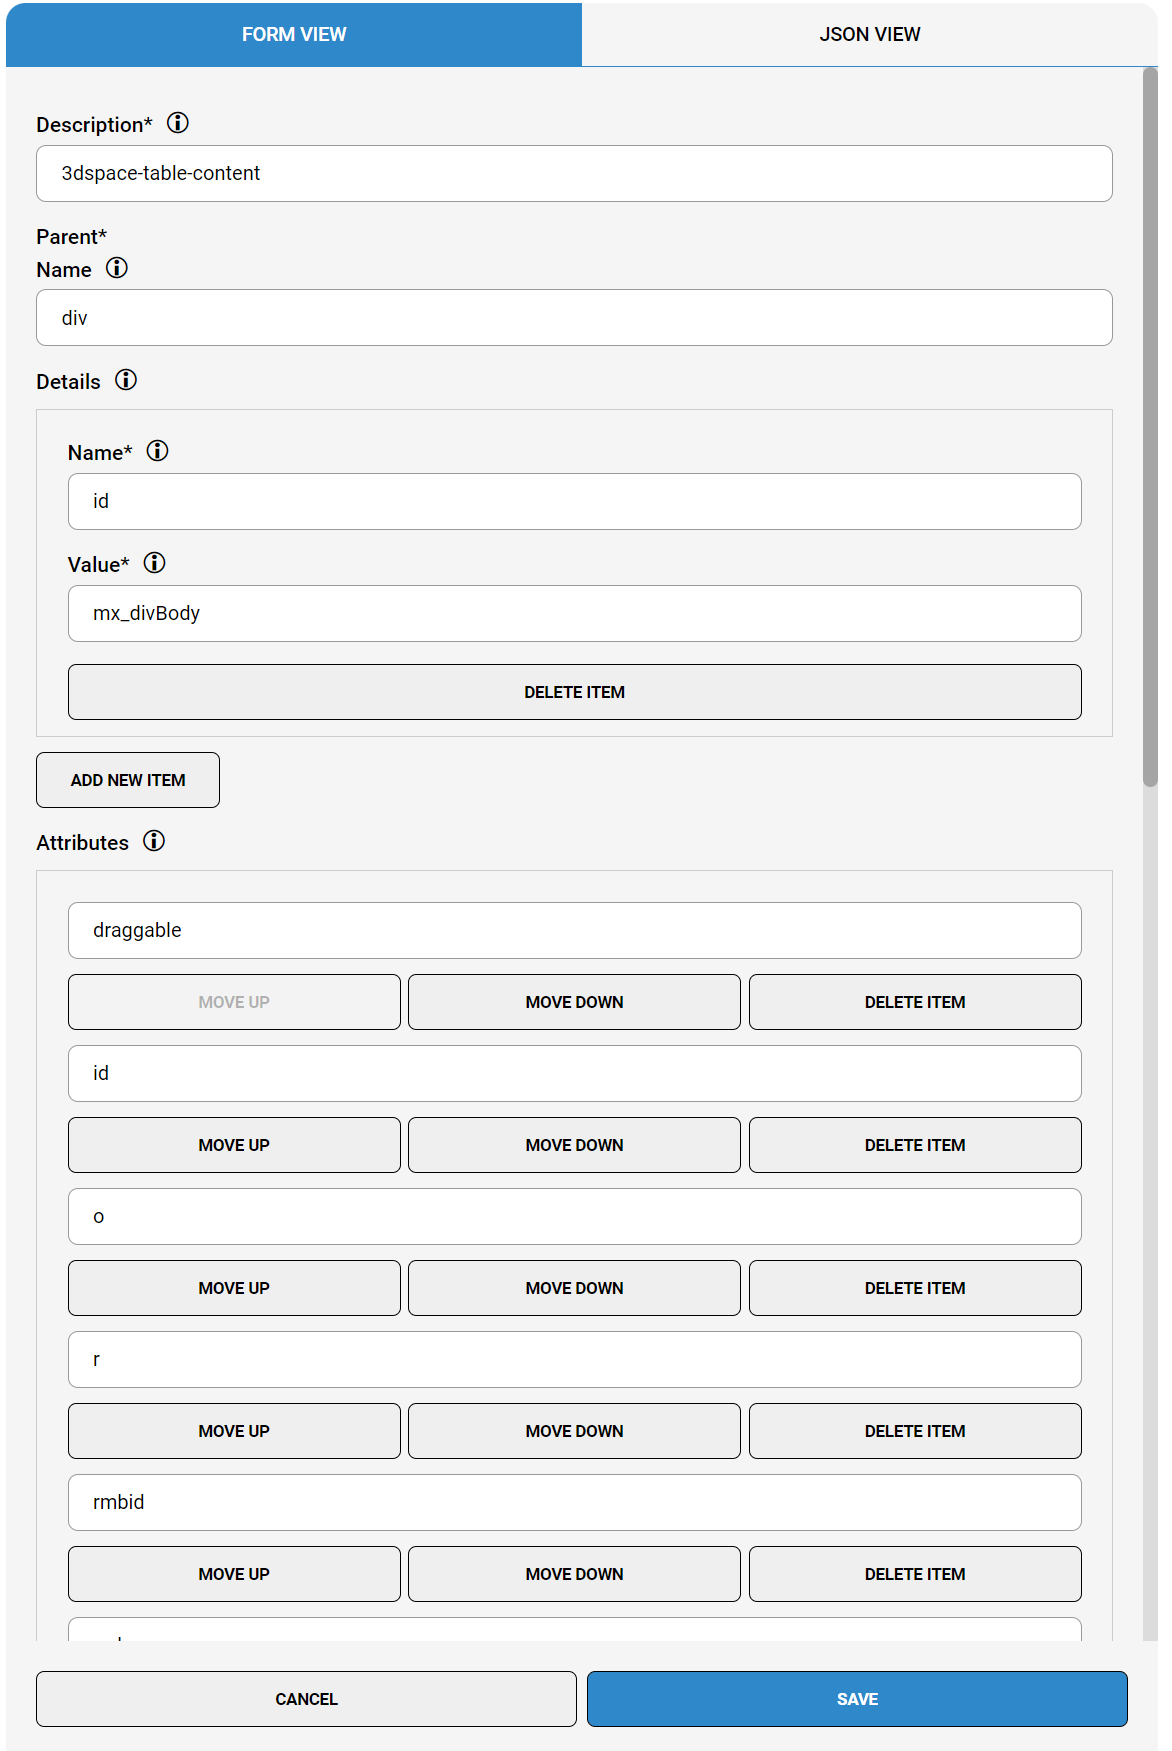
Ignore by parent is used as ignore lists but will make the configuration valid within the scope of a specific parent only. This would be useful if you like to exclude common attributes like name in a specific scope only but retain it in other places. The name and details fields are used to identify parent elements. Attribute, Classes and Inner text to control ignore behavior in scope of that parent.
Fields
Description | used by admins to understand what is covered |
Parent Name | the element type used to identify the parent element |
Details Name | the attribute name used to identify the parent element |
Details Value | the value of the matched attribute used to identify the parent element |
Attributes | the list of attributes to ignore in scope of the matched parent element |
Classes | the list of classes to be ignored in the scope of the matched parent element |
Inner Text | if checked the inner text of targets within the scope of the matched parent will be included |
To avoid the risk of ignore configuration affecting recordings for other parts of the application in a negative way, using by parent scope is good practice.
Ignore Anchors
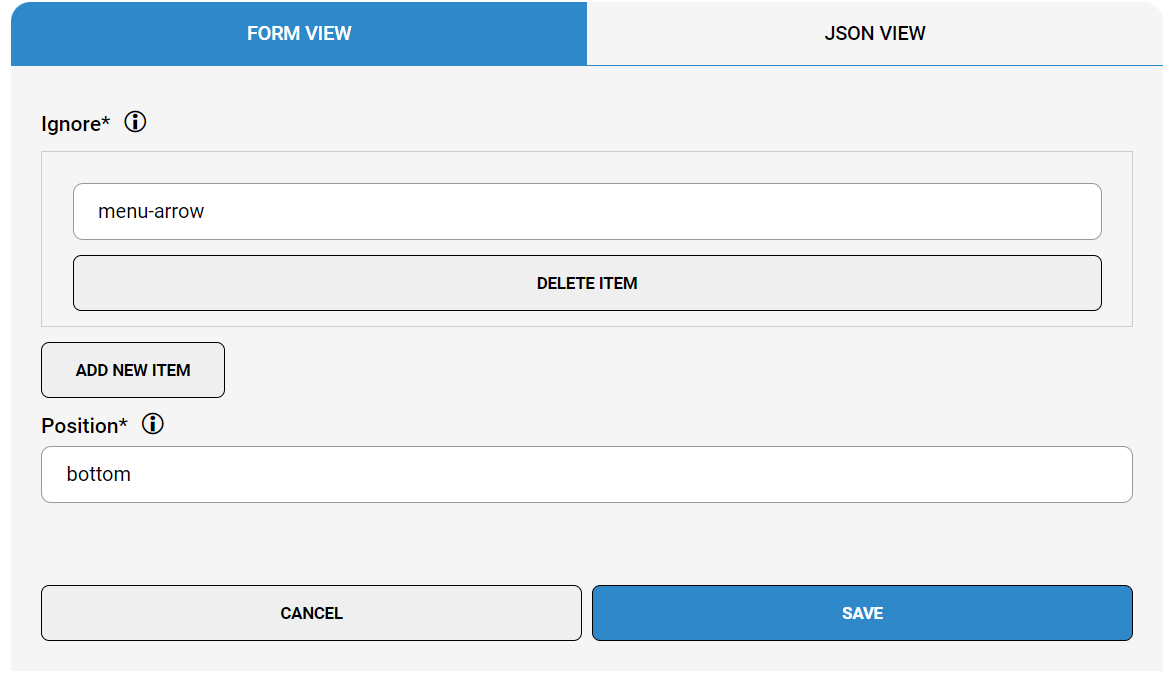
Ignoring anchors points during target selection could be useful for cases when it does not work well. Anchor points could be problematic for very small targets or if the target by script automation disappear as you hover an anchor point and then it makes sense to inactivate it. In these cases you could instead define a default and the author could always control this in the next step using the advanced settings for the instruction.
Fields
Ignore | a list of classes to identify elements that should be ignored |
Position | the default position to be used in case of match |
Controlling when instructions are shown
To make instructions show at the right time, the recordings have to react properly to application state. For this to happen there are some different configurations related. While ‘Contexts’ and ‘Target states’ are presented for the author to choose, the ‘Focus’ condition is silently used in the background.
Contexts
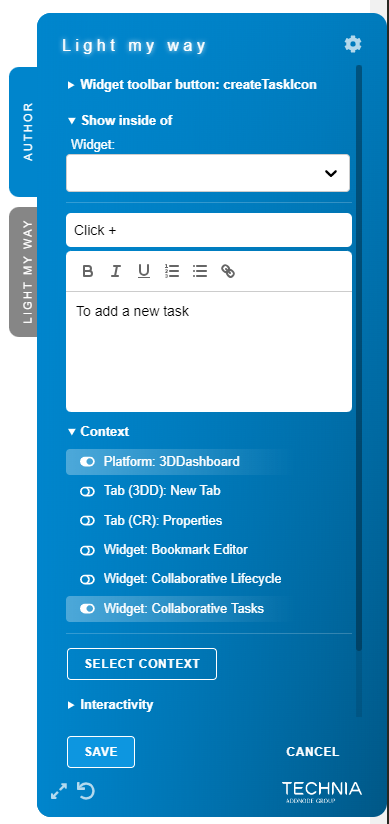
The list of contexts is used by authors to control when an instruction is shown/evaluated. The list of contexts is controlled in the Admin UI and is only presented to the author if available for inclusion with the current target selection.
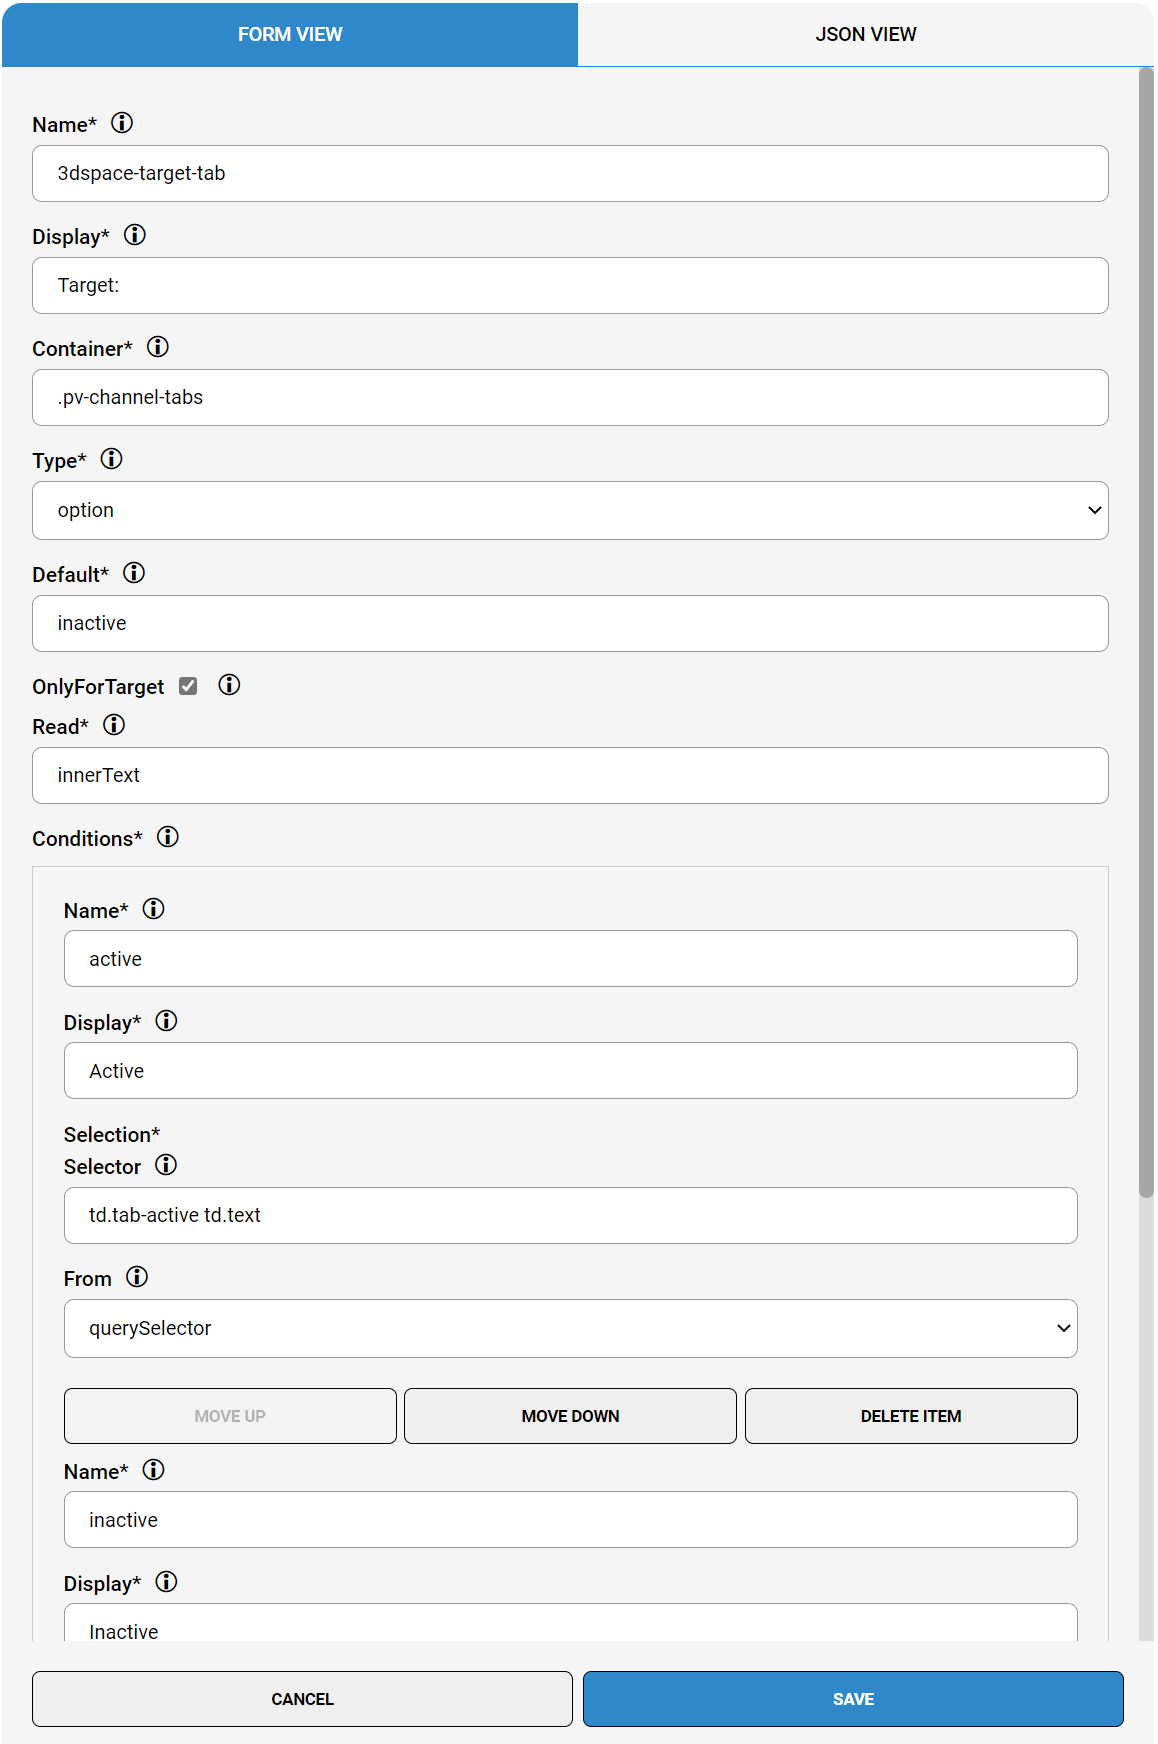
The contexts are configured using CSS selectors.
Fields
Name | a unique id |
Display | how to present the context to the author |
Container | the element to use as base for the context evaluation |
Type |
|
Default | the default condition name |
Only for target | evaluate the context for selected target element only (see target states) |
Read | the unique data used to
|
Conditions Name | a unique id for the condition option |
Conditions Display | Displayed to author in drop down in case of option type |
Conditions Selection Selector | css selector to match the element |
Conditions From | The evaluation technology |
Visible | Require the context element to also be visible otherwise excluded |
Default Enabled | Defaults the context to be toggled for inclusion as the author records |
Hidden | Hides the context under expandable more section |
Parent Context | An array of parent context ids. During evaluation, one of the parent contexts need to be found for the context to be evaluated. |
Using contexts is good for performance as it filters out instructions for evaluation based on matching context state for the current view.
Target states
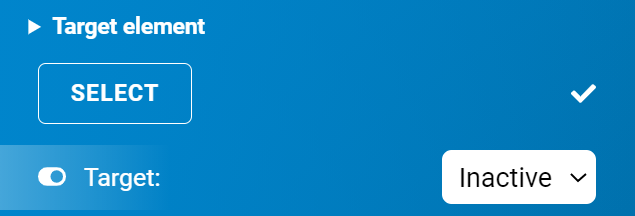
State specific to the selected target element is used to control when a callout should display when the target itself carries state.
The target states are configured using CSS selectors the same way as contexts, but you simply check only for target checkbox.

Focus conditions
Focus conditions are used to limit evaluation within the focused element if present. Very useful to make all other callouts not in the focus group automatically hide as long as the focus condition is fulfilled (e.g. hide background callouts when search is open). Focus is a silent feature and the author is not aware this actually happens behind the scenes.
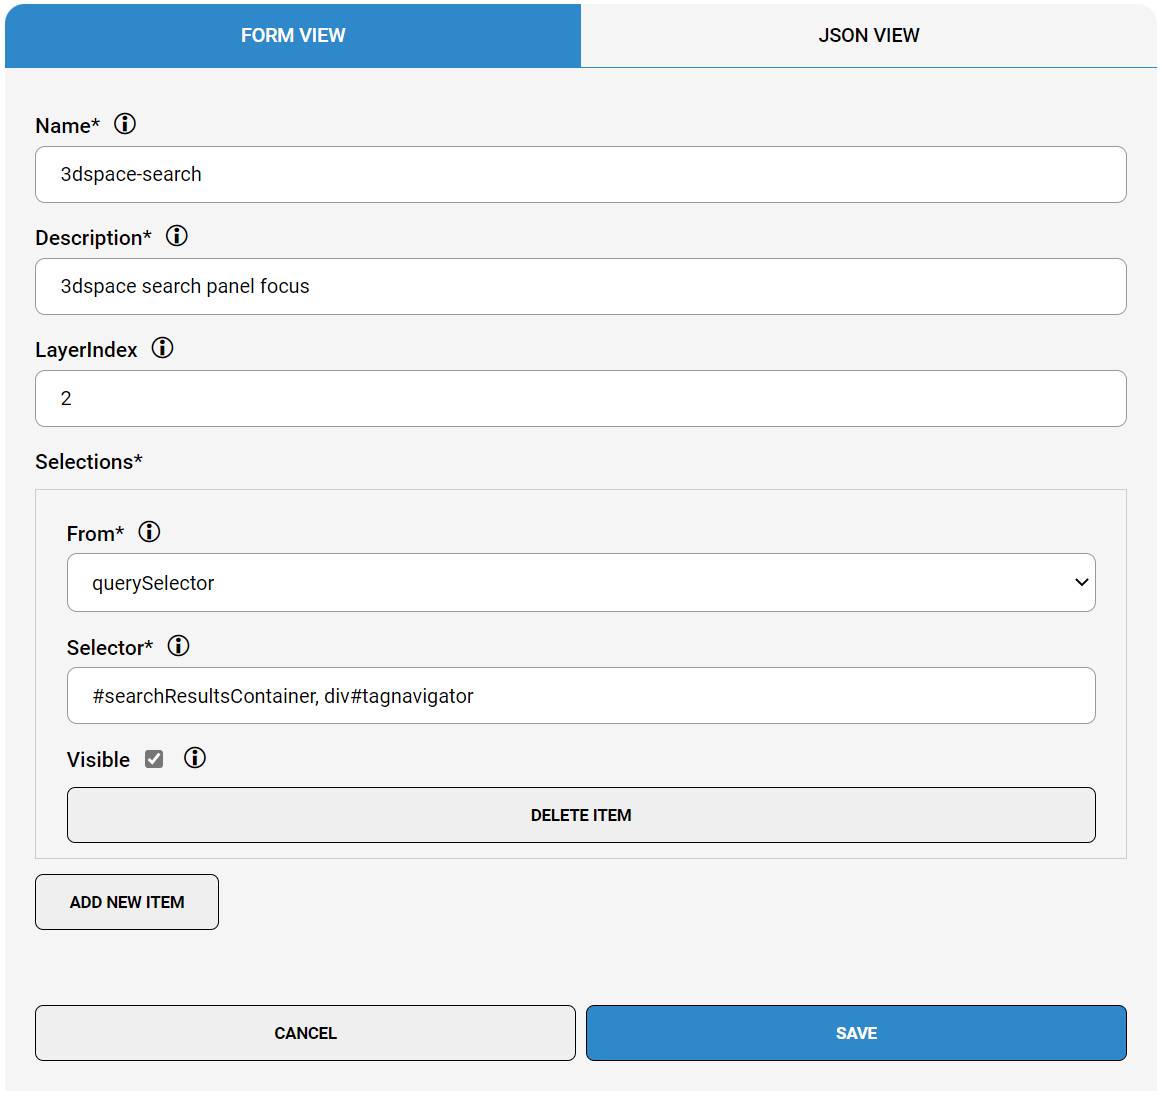
Focus conditions are configured using CSS selectors.
Fields
Name | a unique identifier |
Description | used by admins to understand why it was added |
Layer Index | defines priority in case of multiple focus elements is found |
From | css query selector currently only supported |
Selector | css selector to identify the focus element |
Visible | if the focus element have to be visible to be valid |
Only Inside Parent Condition | If checked/true, the focus condition will only affect callouts inside the same parent condition. |
Using focus is good for performance as it limits the evaluation to happen within the focus element.
Focus configuration will affect green or highlighted target elements during selection
It is mandatory for target element's selection to start within the focus area. I.e. starting elements have to start on or within the focused area or it will be excluded from evaluation.
Parent Contexts
Parent Contexts control if a target element or context should be evaluated or not.
If a target element or context has parent contexts then one or more of those parent contexts needs to be available in order for that target element/context to be evaluated.
For target elements this is mainly a performance improvement for authors, but for contexts this limits (scopes) the evaluation of all contexts to only evaluate those that have a possibility to be present.
This improves the performance for all users.
E.g. 3DDashboard widgets should only be evaluated in 3DDashboard and not 3DSpace.
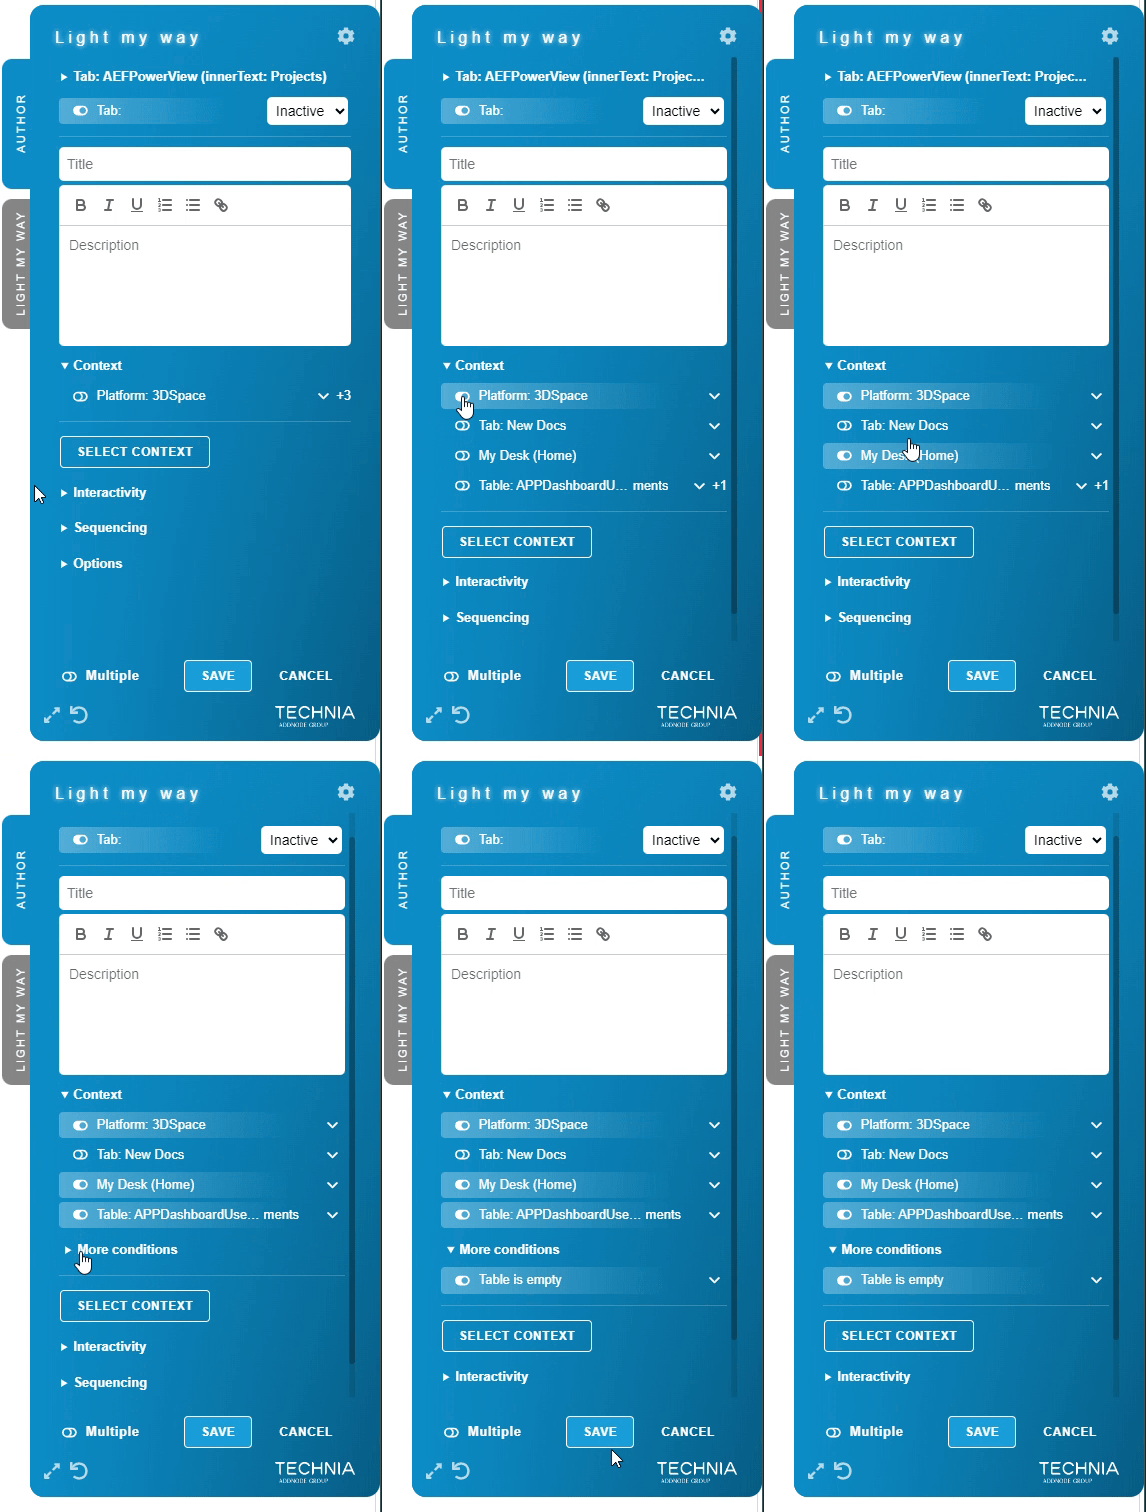
Additionally authors also need to enable the parent context first in order for the rest of the contexts to show up. This also improves performance for all users.
Overriding the built-in default configuration
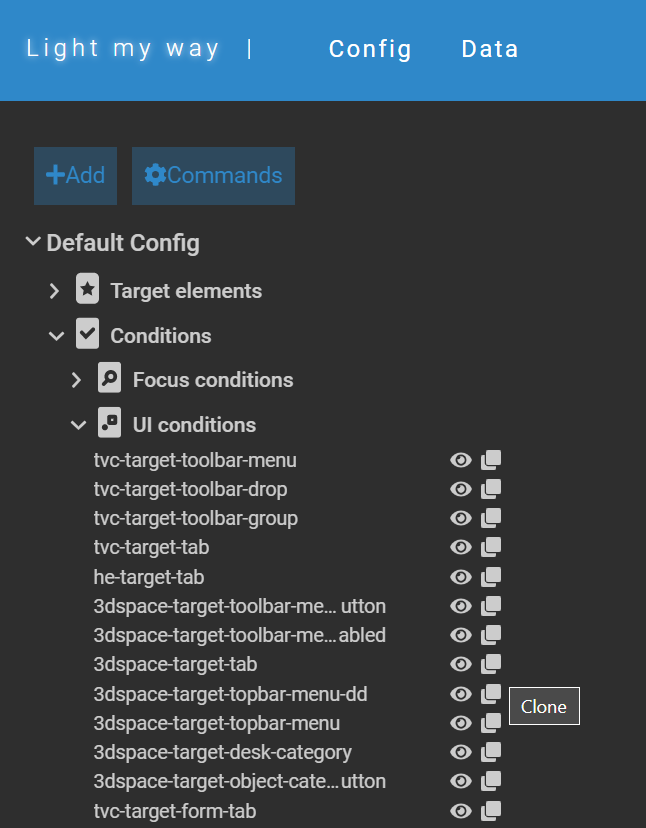
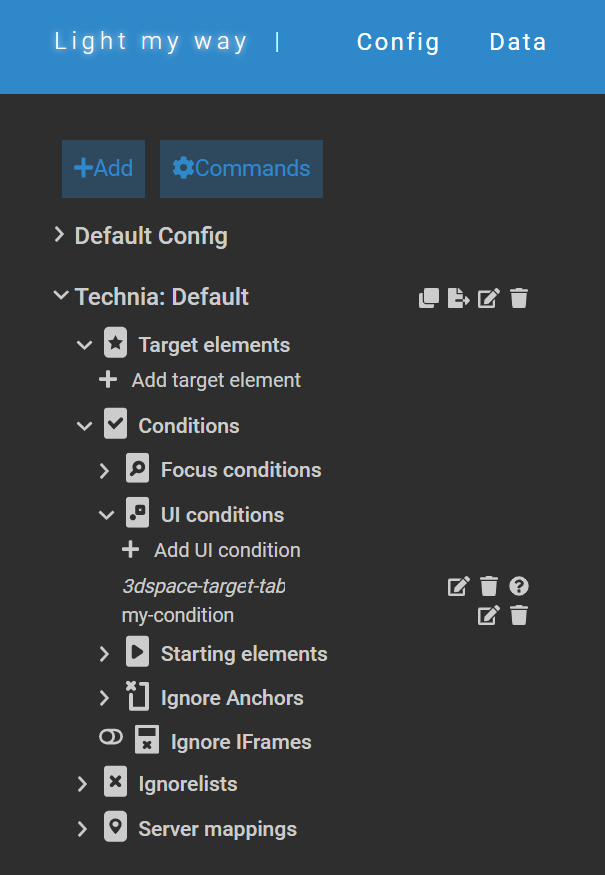
Light My Way comes with a rich set of built-in and supported configurations for target platforms. If for some reason like to override behavior of a built-in configuration it is possible to clone it into your target configuration.
Cloned definitions will be styled italic in the admin UI.
By cloning a configuration you will take over that definition and will not benefit of potential updates to the built-in definition.
Server Mappings
Server mappings will be deprecated
Instead of server mappings customers are advised to use registry settings to auto-connect new installations to the correct account and repository - Client Installation.
Repository
Repositories are commonly used for separating guides and/or config based on state. E.g. one repository could contain “released“ guides for use in production and one could contain guides that are “in progress“ or not completed yet, before they are moved to the production repo to be used by the consumers. (companyName/prod & companyName/dev).
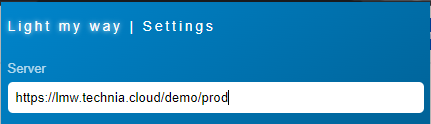
Switch between repositories from extension is done in extension settings.

Create
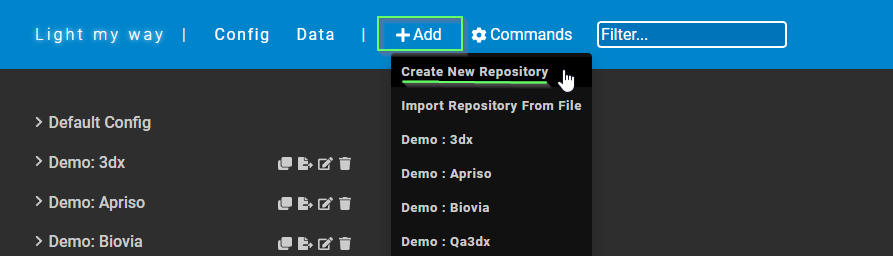
Create a new repository by clicking the toolbar “+ Add” command, then selecting “Create New Repository“.
Root repository
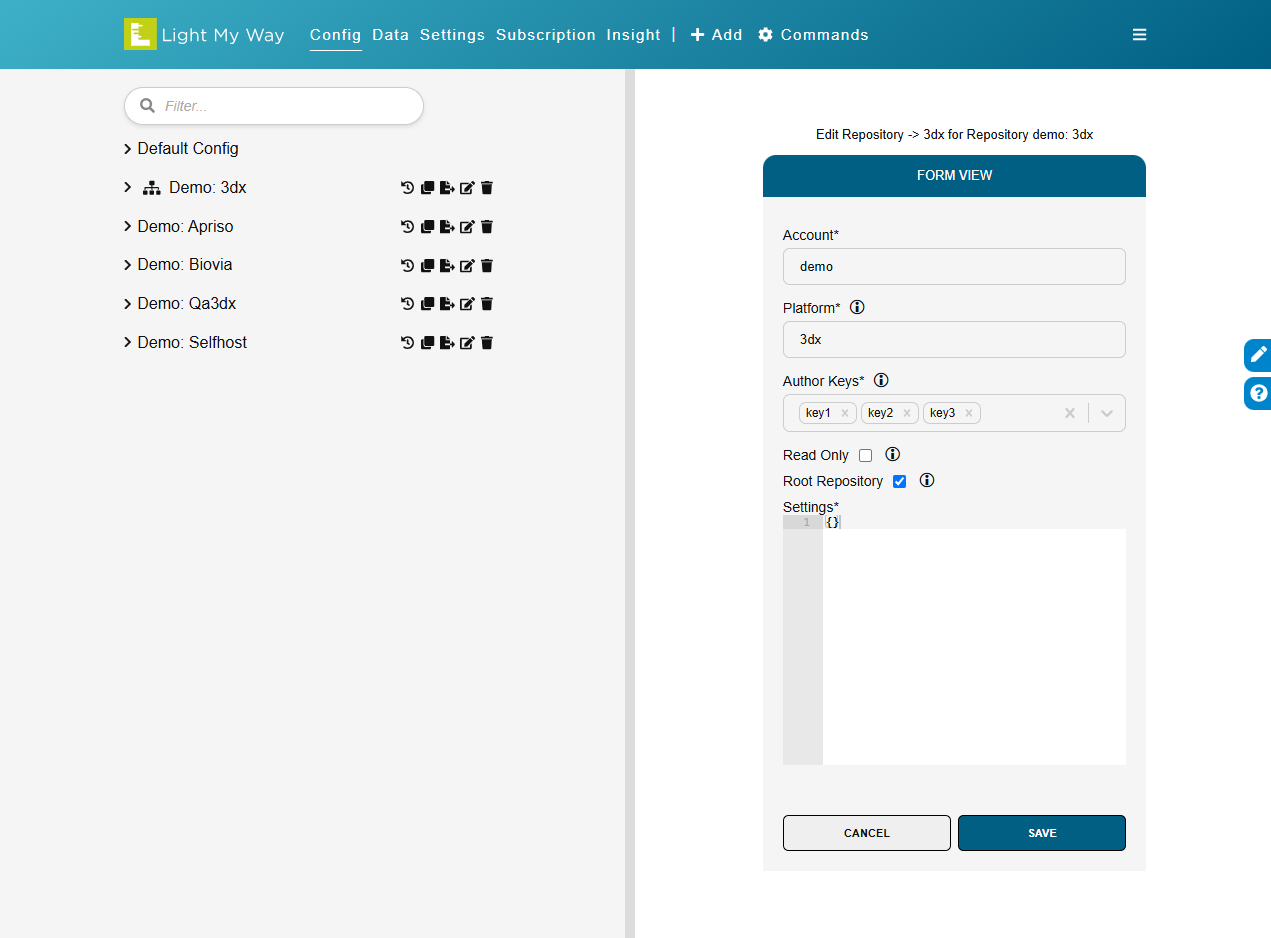
If a repository has root repository toggled on then that repository will be included in the root server URL e.g. https://lmw.technia.cloud/<customer-name>.
This makes it possible to have separate repositories for separate domains, processes etc. and the consumer would simply connect to the root repository to access all guides.
Authors will still have to connect to the specific repository to edit the guides e.g. https://lmw.technia.cloud/<customer-name>/3dx
Template data
Template data repositories are maintained by TECHNIA and can be shared across accounts.
As an account administrator, you can choose which template repositories to include in your account root repository so end users can access that guidance through the normal root URL.
Template data inclusion is managed from the Data tab:
- Enable or disable each shared repository for the current account
- Enable all or disable all shared repositories in one action
- See each shared repository by display name
- Review the shared repository content directly in the tree (guides and instructions)
This makes it easy to start from maintained baseline content and include only the template data that is relevant for your users.
Note: If Shared Repositories is not visible, or if the list is visible but empty, no template data has been enabled for this account. Contact TECHNIA to get template data enabled for your account.
Edit
Edit a repository by clicking the edit icon next to the repository name.

Settings
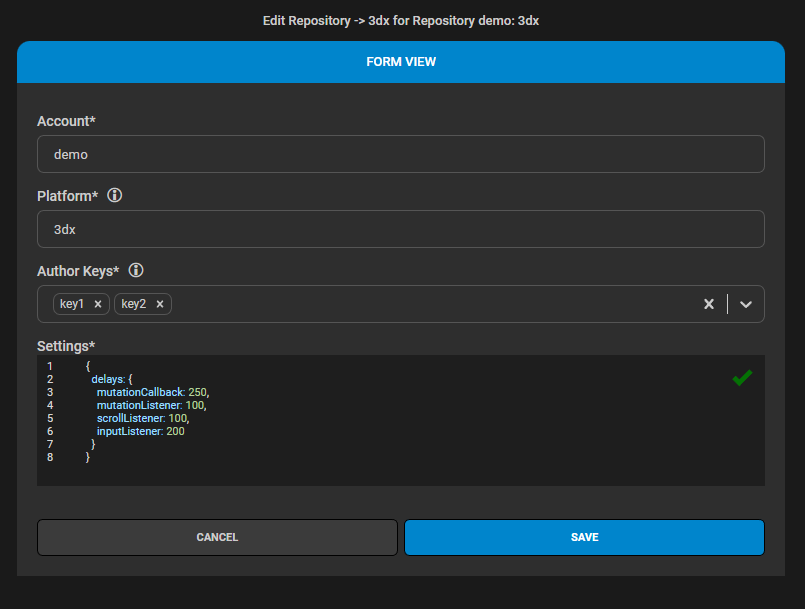
Example:
{ "evaluateToggledGuidesOnly": false, "delays": { "mutationCallback": 250, "mutationListener": 100, "mutationMaxWait": 500, "scrollListener": 100, "inputListener": 250 } }
Setting (key) | Description | Type | Default |
|---|---|---|---|
| Used to tune debounce for performance based on your env specifics. A
low debounce gives a quick response to the user but a higher
performance footprint as evaluation happens more often. All evaluation
debounce is controlled inside |
| |
| Input fields. e.g. debounce when typing text |
|
|
| The time between evaluation |
|
|
| How often html DOM updates is communicated (per document / iframe) |
|
|
| Maximum wait before forcing a mutation message even when continuous mutations keep resetting debounce. |
|
|
| When scrolling how long to wait until reposition |
|
|
| Debounce for usage actions used by usage insight feature |
|
|
| Depending on your authors recording methodology you might consider a different evaluation strategy. In case you want to record guides in the context it belong only and use the available now feature you will go by the default and evaluate all by context. In case you want to guide users from anywhere to everywhere the available now feature makes no sense but the extra evaluation would only drive load and you should evaluate toggled guides only. |
|
|
| Toggle off or on usage logging |
|
|
| Set this to |
|
|
| Set this to |
|
|
| Used to select what configs should be logged into the platform insight. |
| |
| List of focus condition ids that should be logged into platform insight. |
| |
| List of context ids that should be logged into platform insight. |
| |
| List of parent context ids that should be logged into platform insight. |
| |
| Used to select what configs should be sent to the AI. |
| |
| List of context ids that should be sent to the AI. |
| |
| An url to a form, mailto:email or similar. If present a feedback button will appear in the extension. |
| |
| Custom title displayed for the user feedback action. |
|
|
| Controls where the user feedback action is displayed. Supported values
are |
|
|
| An url to an endpoint where, if present the usage data will be sent instead of Light My Way servers. Here the customer can decide on how to visualize and handle the usage insight themselves. |
| |
| List of user preferences that should be toggled on by default for all users connected to the repository. Available preferences:
|
| |
| The distance from the target in pixels from which the callout should minimize. |
| 100 |
|
| ||
| Set this to control the default position of the panel.
|
| |
| Set this to control default |
| |
| Set this to |
|
|
| Set this to |
|
|
| Set this to |
|
|
| Set this to |
|
|
| Set this to |
|
|
| Set this to |
|
|
| Set this to |
|
|
| Set this to |
|
|
| Set this to Available formats:
|
|
|
| Set the default language for Light My Way. Current available languages:
|
|
User feedback configuration
The user feedback action is enabled by setting userFeedbackUrl.
The displayed title and location can also be customized using userFeedbackTitle and userFeedbackPosition.
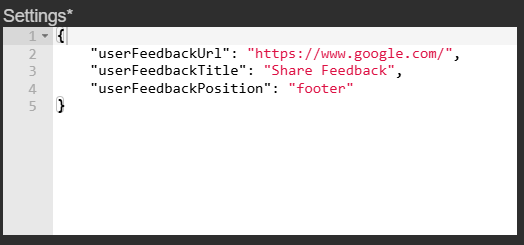
Example:
{
  "userFeedbackUrl": "https://www.google.com/",
  "userFeedbackTitle": "Share Feedback",
  "userFeedbackPosition": "footer"
}
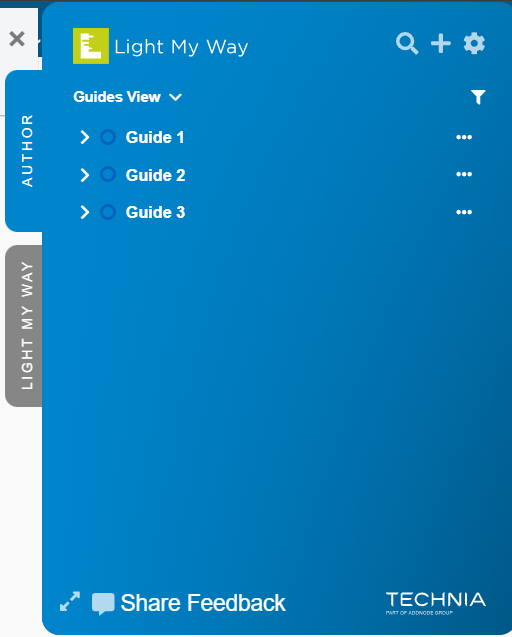
The feedback action can be displayed in the panel footer:
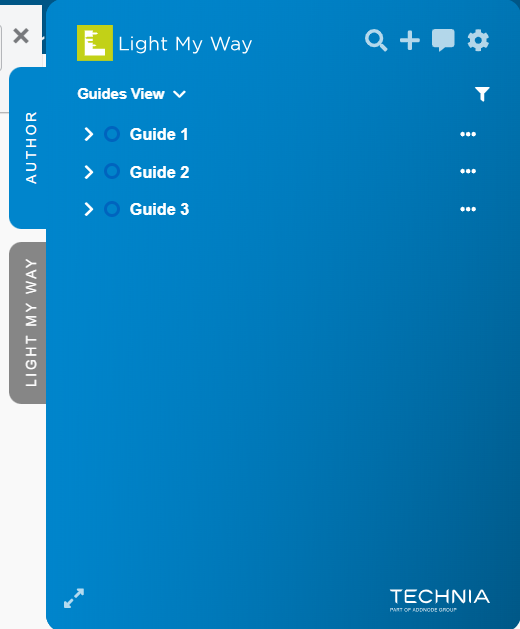
In the panel header:
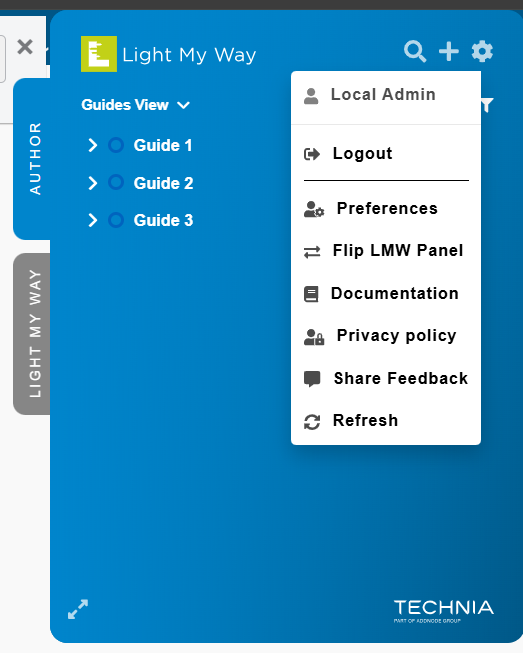
Or in the Settings menu:
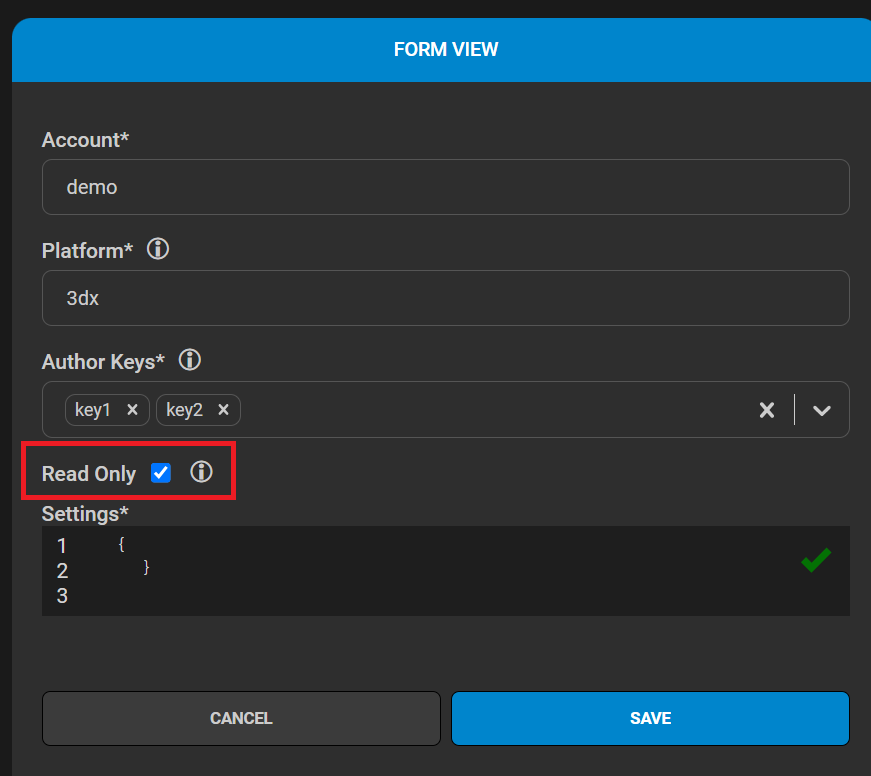
Read Only
If “Read Only” is checked the repository wont be editable by the Authors.
Use this on repositories that are used in production to protect it from being accidentally edited or changed.
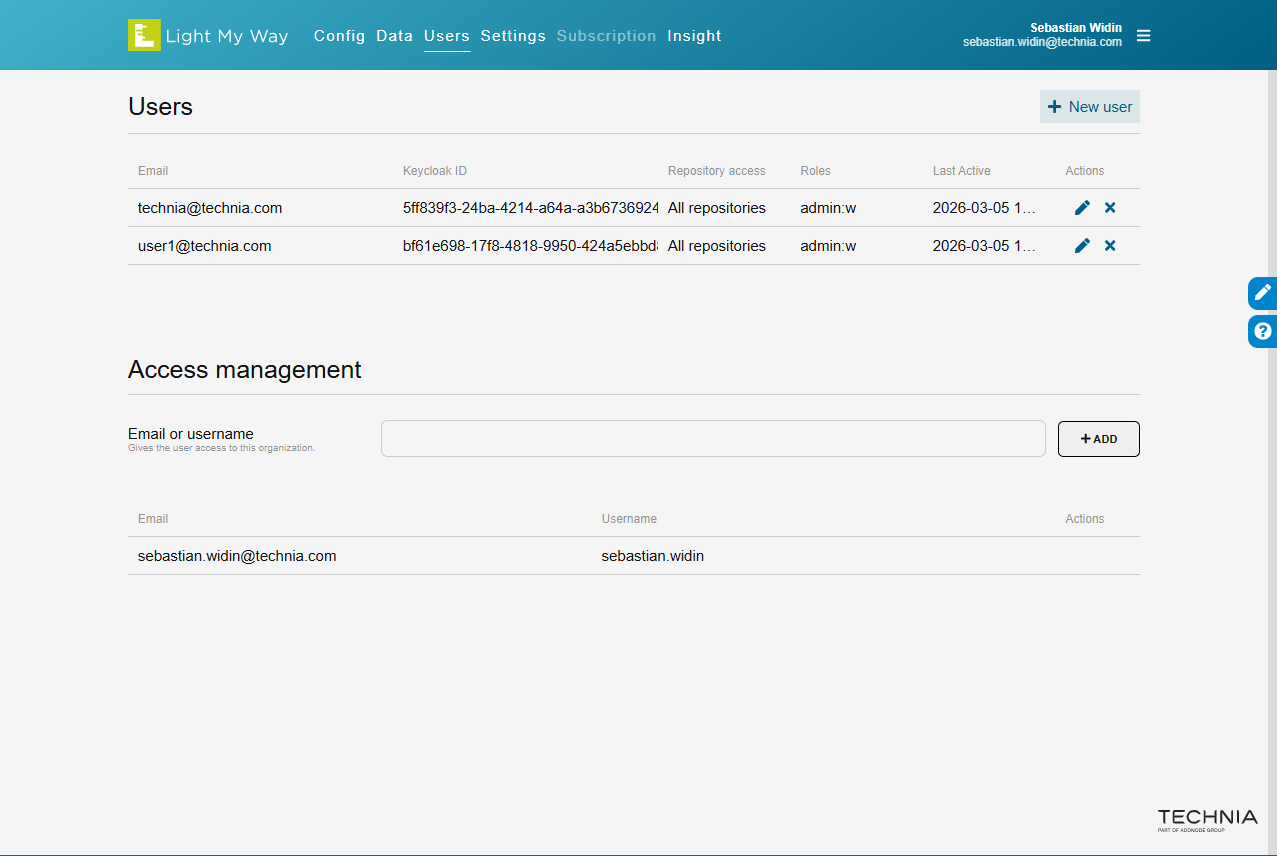
User management
Admin accounts have authoring rights, but if you want to add an author you need to add that user in the Admin UI.
Granting access to TECHNIA users
This is also where you can give access to users from TECHNIA upon request to get help with configs, authoring etc.
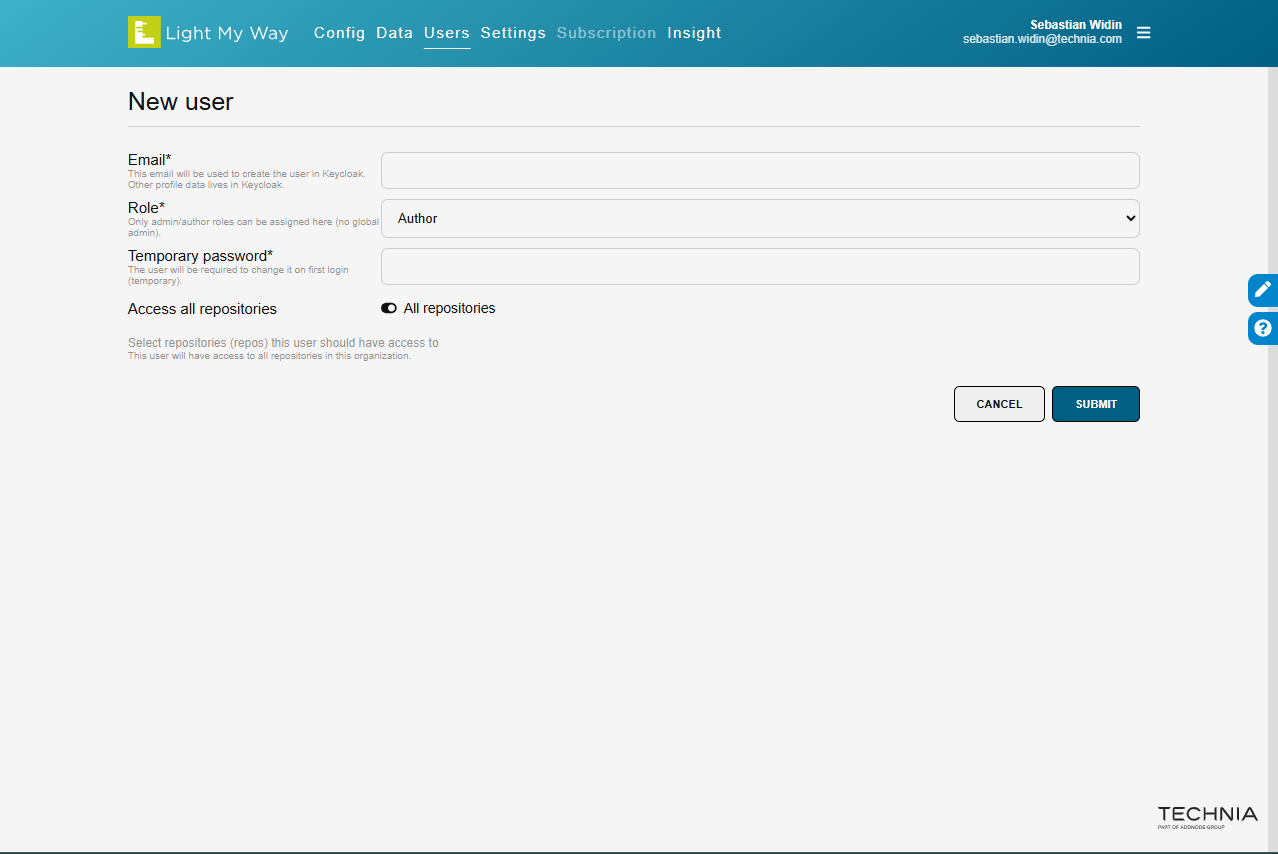
Repository access
When adding a user you can also assign access to certain repositories (or toggle all repositories)
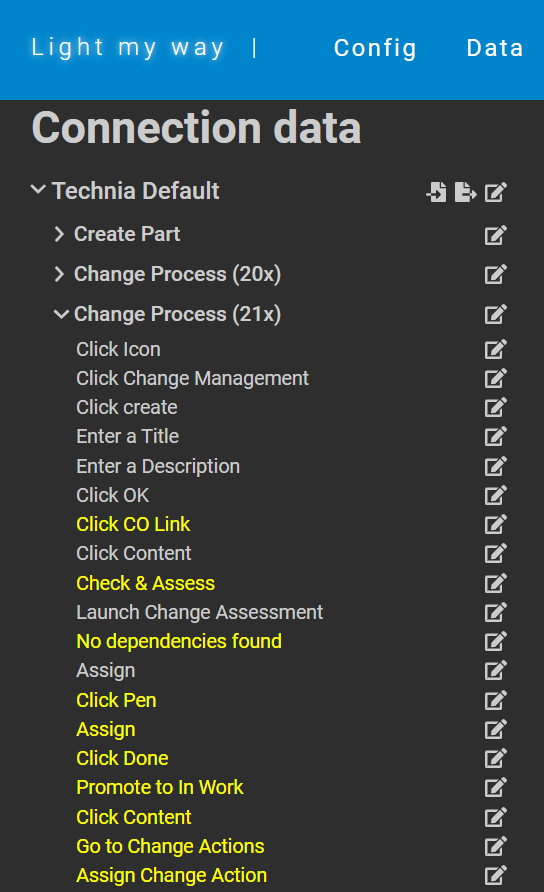
Data management
Administrators can view and edit all guide and instruction data from within the Admin UI. Accessing data could be useful in collaboration with Authors, troubleshooting etc. The Data view is accessed from the Data tab found in the top bar.
Data entries using xpath is indicated with yellow.
Document view
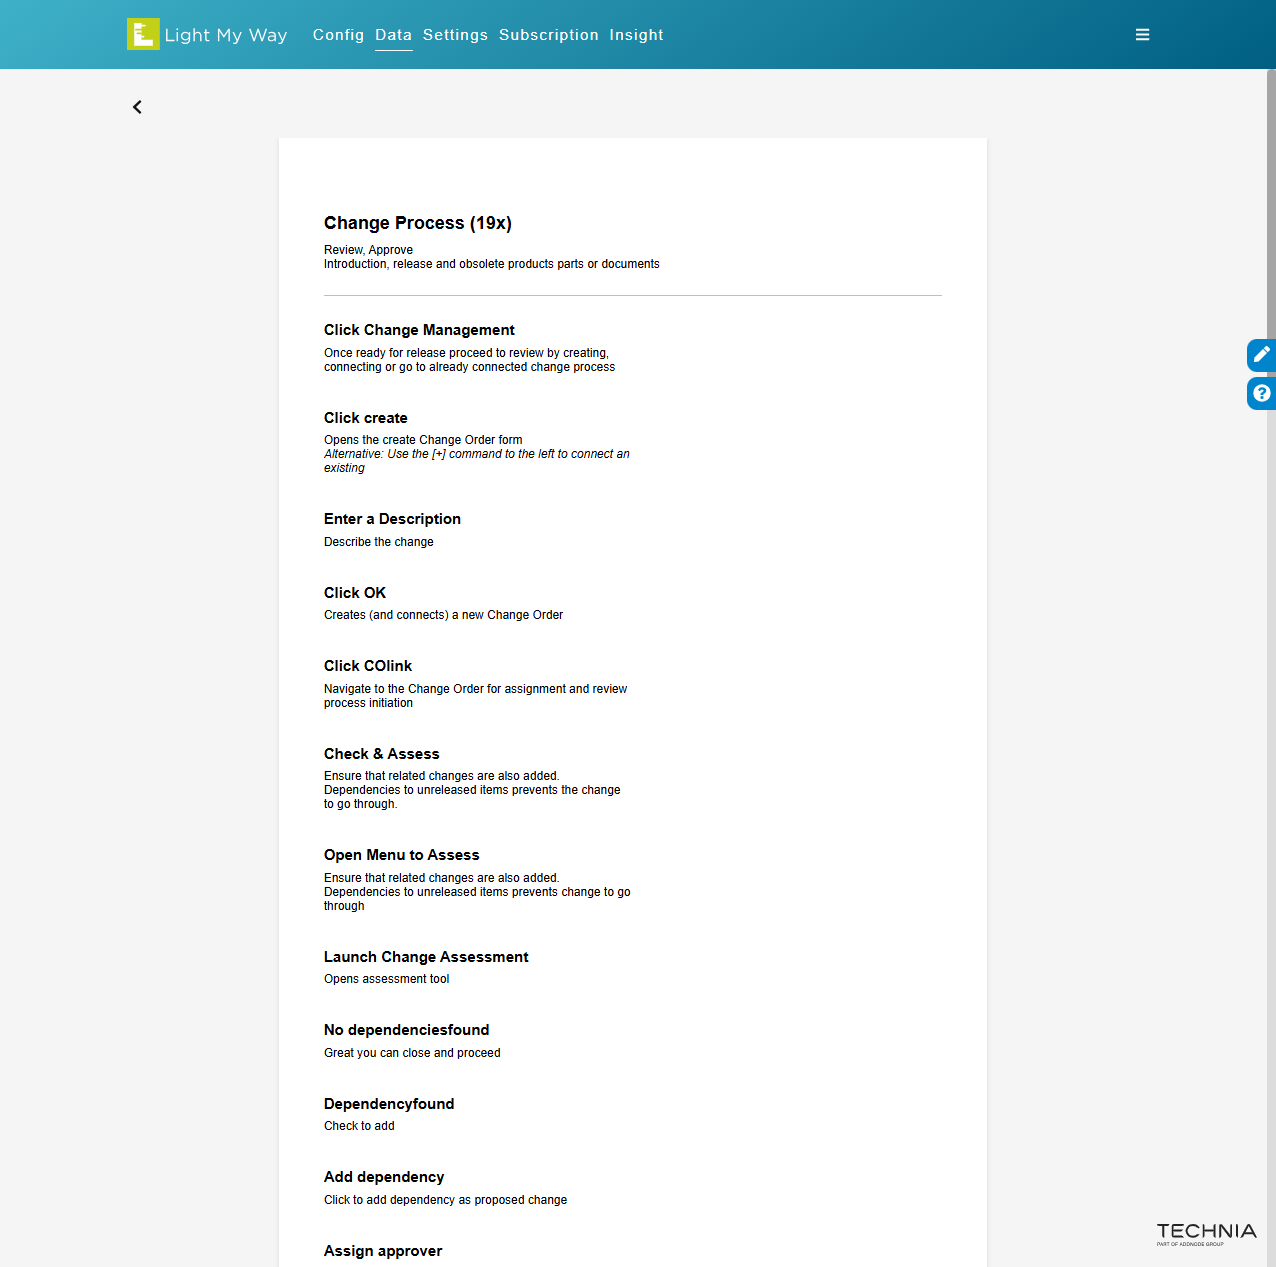
By clicking the document icon next to the guide name the Administrator can see the guide as a document. If the guide has screenshots these will be shown as well.
Export guides
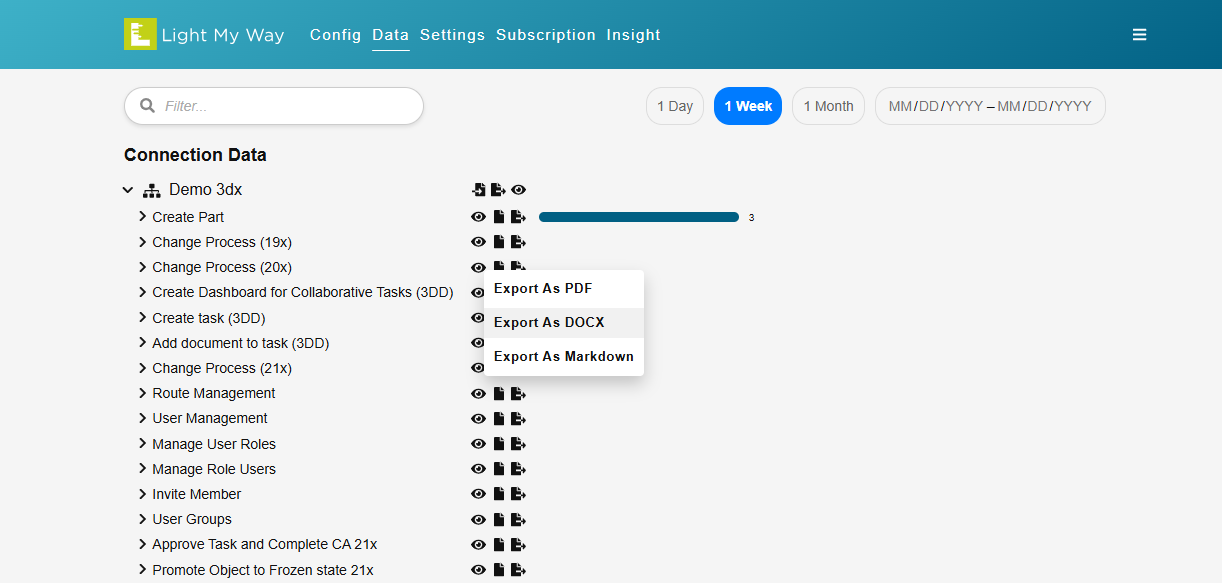
Guides can be exported as PDF, DOCX or Markdown. This enables Authors to record guides and processes in one place and export for Wikis or other file based documentation.
AI Settings
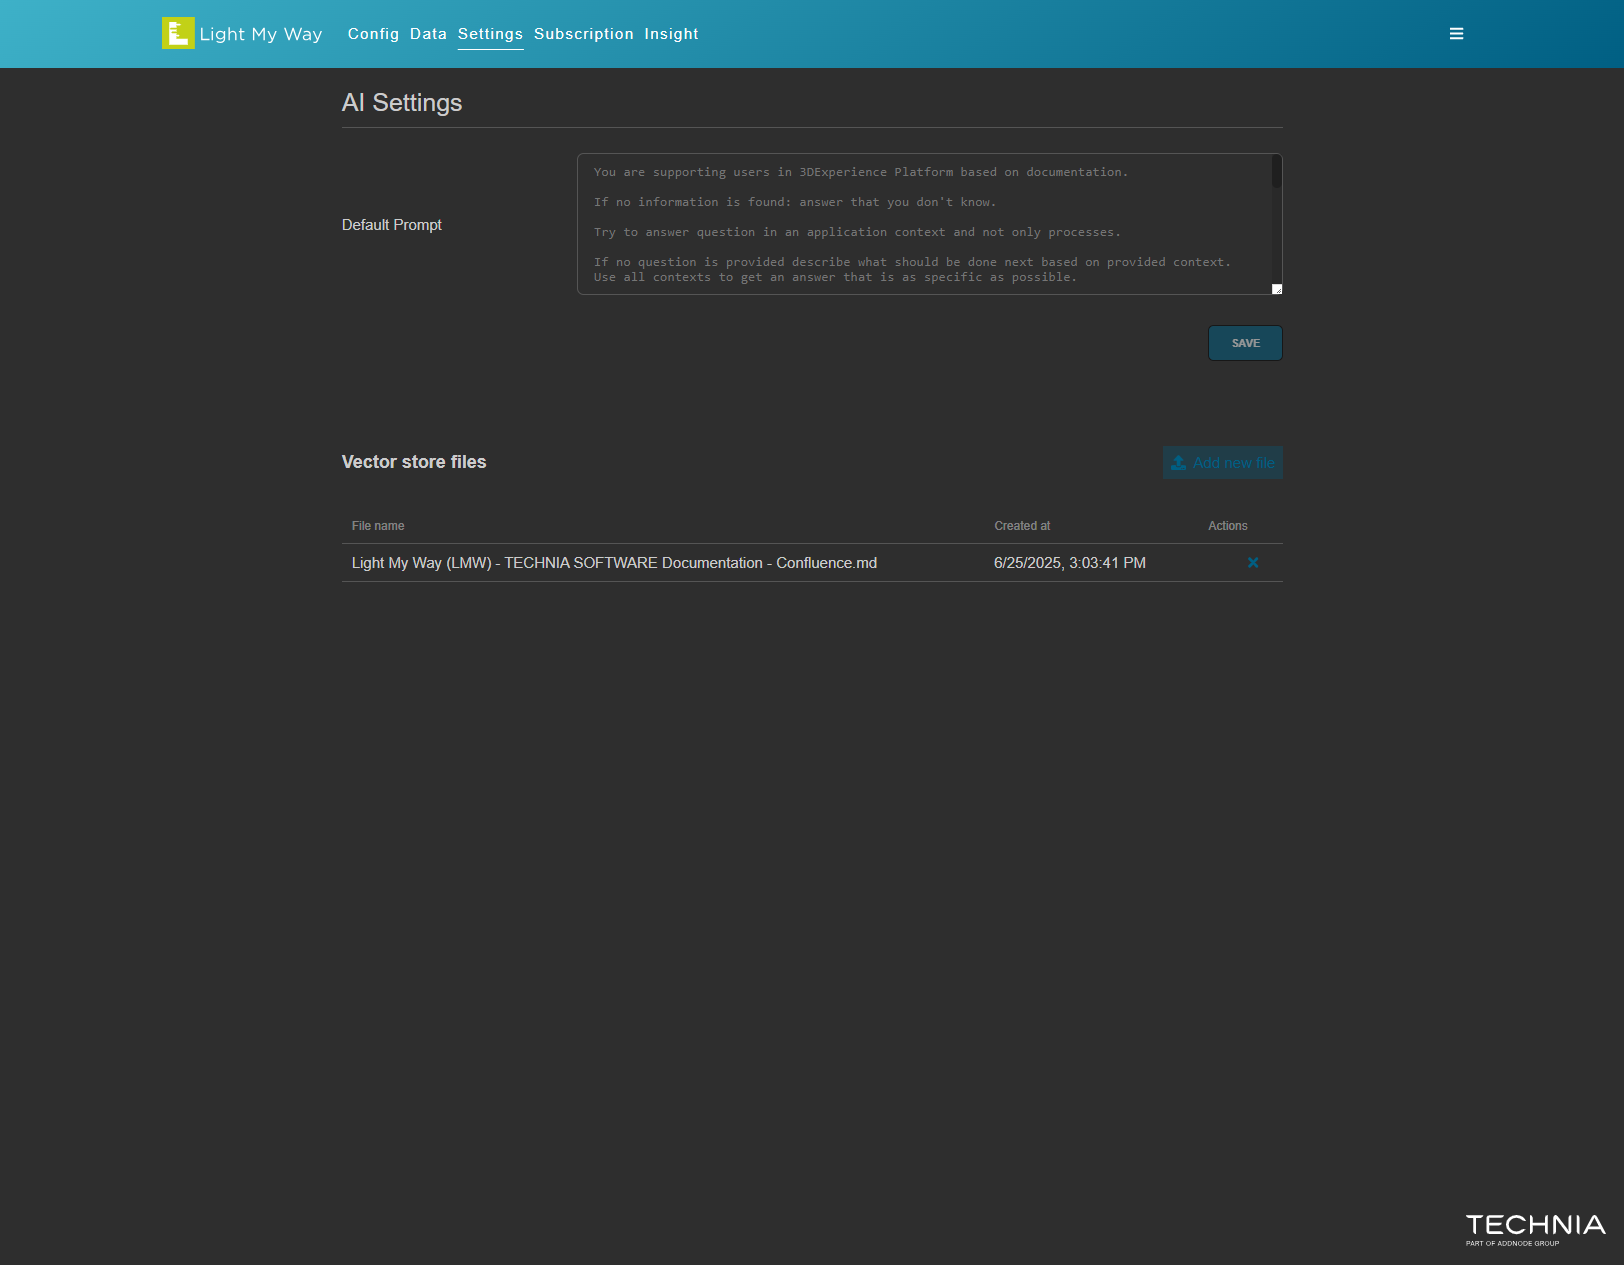
Administrators can now add and edit AI settings to customize both the default prompt (The initial instruction the AI Bot gets) and add their own documentation to be used by the AI Bot to give suggestions and user guidance based on the current application context.
AI Settings support separate prompt controls for:
- Chat prompt (AI assistant responses for users)
- Author Title prompt (AI help used in authoring, such as generated instruction title and description)
- Author Context prompt (AI help used in authoring to select which UI conditions/contexts apply to a step)
- Suggestions prompt (AI-generated instructions)
These prompts can be controlled independently without overwriting the TECHNIA maintained prompts.
Default prompt
Start by configuring the repository default prompts.
- Chat prompt controls assistant responses for end users.
- Author Title prompt controls AI help generating instruction titles/descriptions in authoring features.
- Author Context prompt controls AI help selecting UI conditions/contexts in authoring features.
- Suggestions prompt controls AI-generated instructions.
- Leave a prompt field blank to continue using the TECHNIA-maintained default for that prompt.
These defaults are used as fallback when no scoped AI setting matches.
Add AI Settings (scoped)
Click on “Add AI Settings” to create a scoped AI setting.
Scoped AI settings can be filtered by:
- Repositories
- Contexts (UI conditions)
Use scoped settings when you want different prompts, API key usage, or vector stores for specific contexts.
When multiple scoped settings are eligible, the most specific and highest-priority setting is selected.
Prompt preview
When editing AI Settings, you can preview how your prompts will be merged before saving:
- Click the Preview button next to any prompt type (Chat, Author Title, Author Context, or Suggestions)
- A modal displays the merged prompt showing template and extension sections
Vector store files
Vector store files are searched by the AI Bot to find relevant user guidance based on the current application context.
- Click on “Add new file” to upload files.
- Recommended formats are markdown files, Word files, and PDF files.
- To delete a file, click the X next to the file name.
Import & export
To allow managing configuration and data in SCM tools or to bulk change efficiently using IDE features, it is still possible to edit the configurations JSON data as in previous releases. To do this
- export the database content to the json format
- change the files manually
- delete the database
- import the json data into a new database
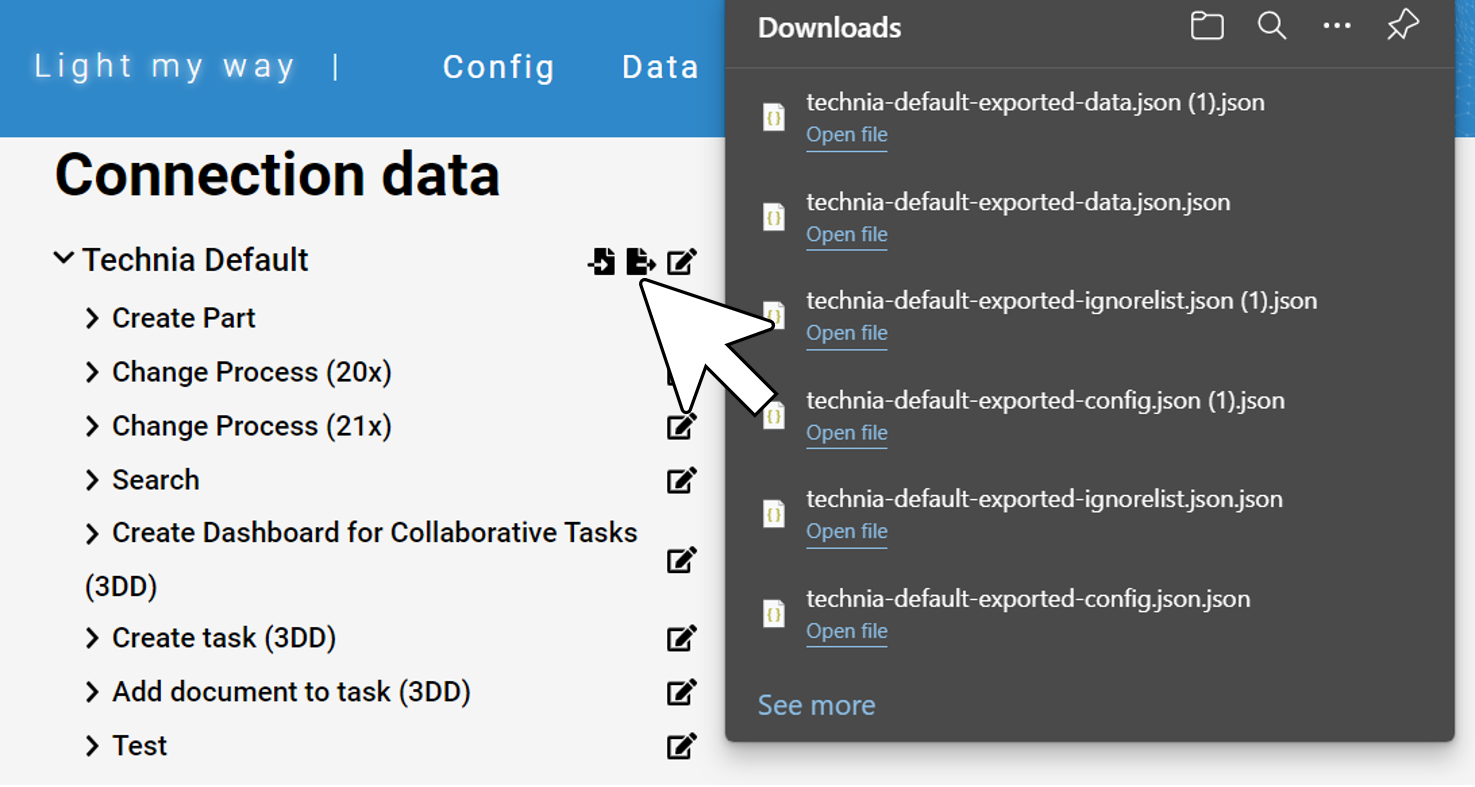
Configuration export
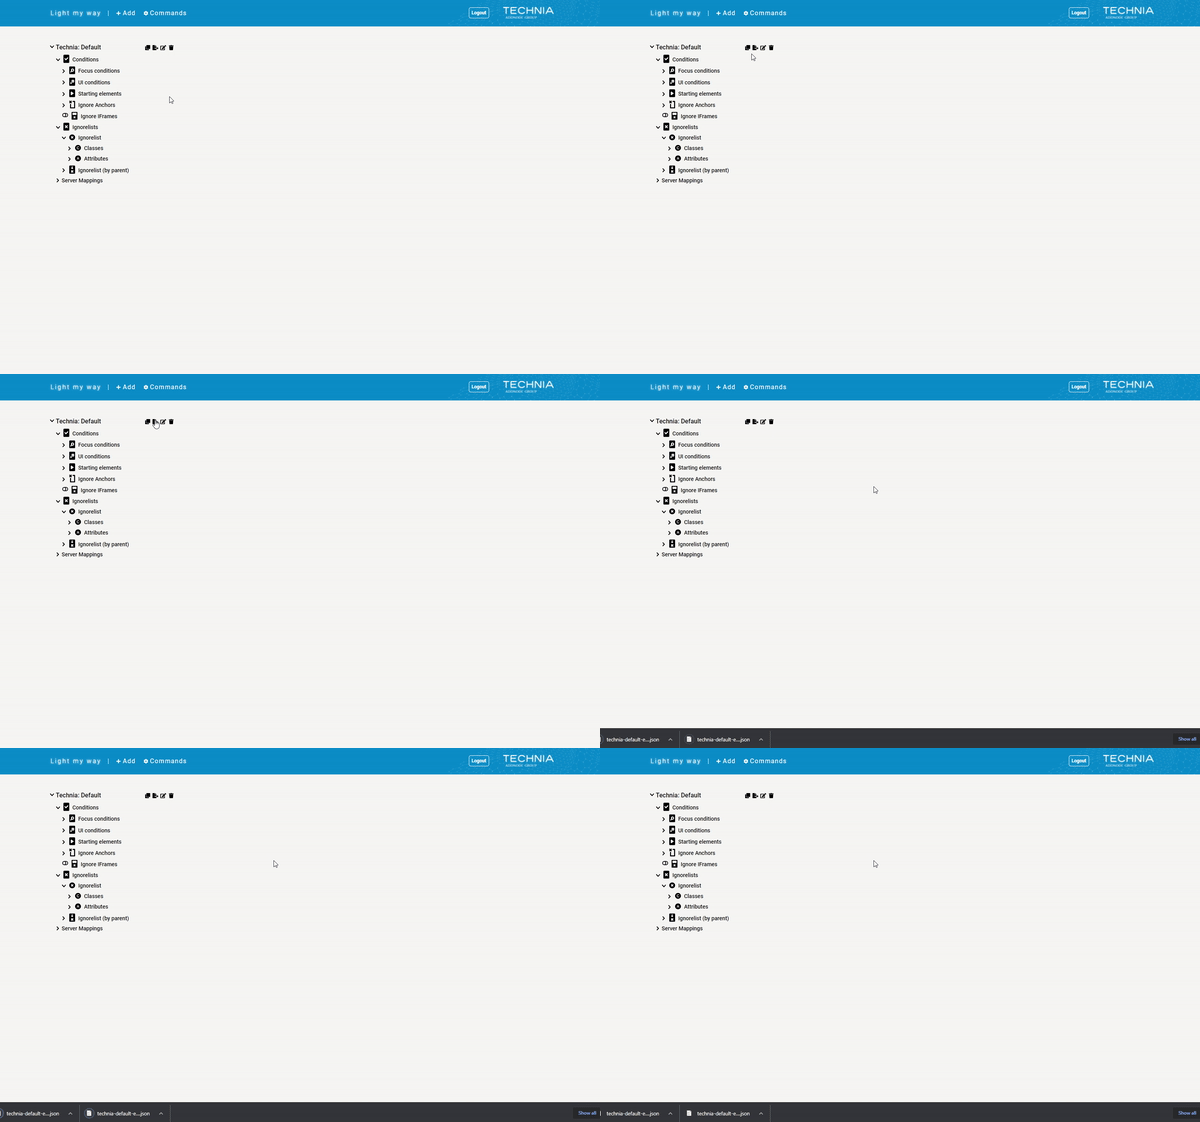
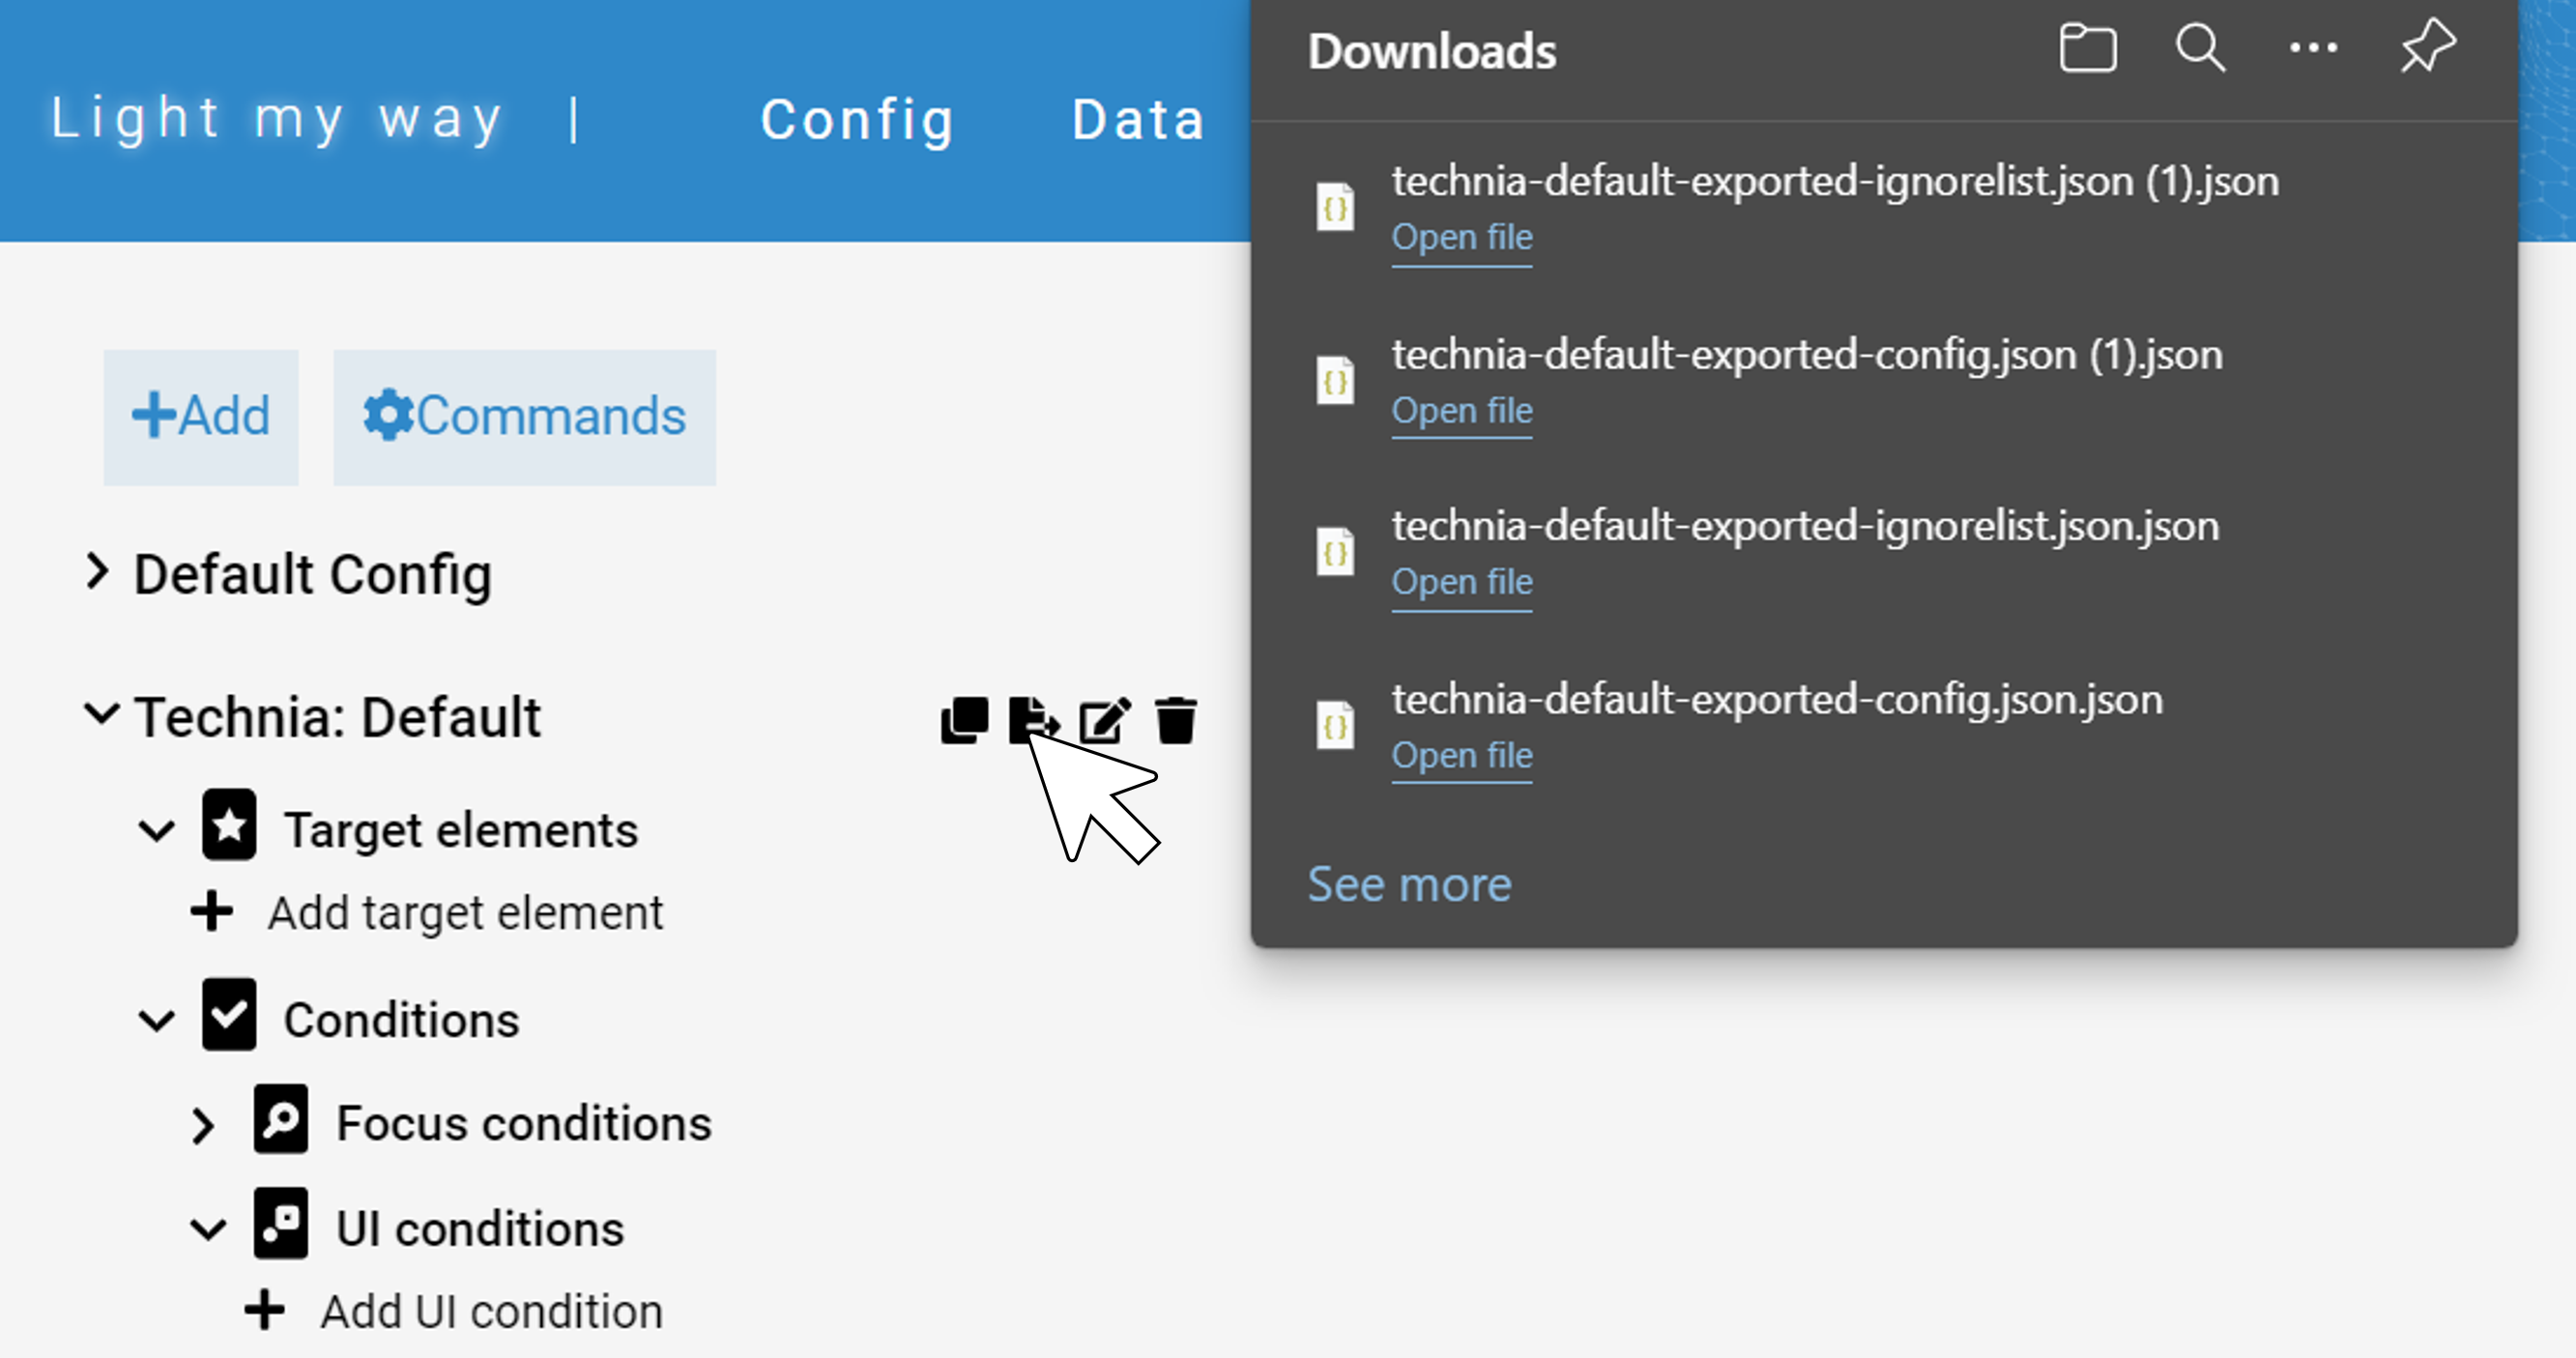
Configurations could be exported from targets. Export could be useful to back up configurations, bulk modifications or storing it in SCM.
Data import / export
Data can be exported and imported from and to targets. This could be useful when moving data from one target to another or if there is a need to bulk modify data in an editor etc. The data export and import commands are available under the ‘Data’ tab found in the top bar.
Importing data including numerical id will override existing and importing without would add new recordings. Numerical id is included with the export format by default. Importing data context reference have to match. Changes to the data could potentially cause problems with the context mapping.